
This post may contain affiliate links. Please read our disclosure policy.

A delightful variation on the classic gluten-free pancake, these gluten-free buttermilk pancakes offer the quintessential diner-style flavor with an added bonus of impressive height, perfect for crafting a truly towering stack. The secret to their elevated texture and robust taste lies in a few key adjustments to a foundational gluten-free pancake recipe.
The Science Behind the Stack: Why This Recipe Works
The foundation of these buttermilk pancakes utilizes the same dry mix as a standard gluten-free pancake recipe, ensuring a familiar base for those who have enjoyed previous iterations. However, the magic truly unfolds in the wet ingredients. The substitution of traditional milk with one cup of real buttermilk introduces a subtle tang and a less watery consistency compared to milk. This contributes to a richer flavor profile and a batter that holds its structure.

Furthermore, the incorporation of melted butter adds an extra layer of richness and moisture, enhancing the overall taste and mouthfeel. Perhaps the most impactful change for achieving that coveted height is the doubling of the egg count. The increased quantity of eggs provides greater structural integrity to the batter, enabling it to rise higher and maintain its form during cooking. This combination of ingredients—buttermilk, melted butter, and extra eggs—works in synergy to create a pancake that is both flavorful and impressively tall.
Essential Ingredients for Elevated Gluten-Free Pancakes
The dry components of this recipe mirror those found in a classic gluten-free pancake mix, with an optional addition for those seeking an extra lift. The true distinctions emerge in the wet ingredients, which demand careful attention to detail for optimal results.

- Gluten-Free Flour Blend: A crucial element for any gluten-free baking. For these buttermilk pancakes, a gum-free blend is highly recommended. Options include Nicole’s Best, a homemade 3-ingredient gum-free blend, or a low xanthan gum blend like Bob’s Red Mill 1-to-1. Blends with standard xanthan gum content can result in a batter that is too thick, leading to chewy and gummy pancakes.
- Xanthan Gum (Optional): While optional, xanthan gum can contribute to taller, more structured pancakes. If omitted, it is advised to slightly reduce the buttermilk by two tablespoons (to approximately 7 fluid ounces) to compensate for the potential change in batter viscosity.
- Baking Soda and Baking Powder: These leavening agents are essential for achieving a light and fluffy texture. The baking soda reacts with the acidity of the buttermilk, while the baking powder provides additional lift.
- Salt: Enhances the overall flavor profile and balances the sweetness.
- Sugar: Provides sweetness and aids in browning.
- Vanilla Powder (Optional): Adds a subtle layer of aromatic sweetness.
- Buttermilk: The star ingredient, providing a characteristic tang and contributing to a tender crumb.
- Melted Butter: Adds richness, moisture, and a delightful buttery flavor.
- Eggs: Double the usual amount, providing structure and helping the pancakes rise tall.
- Vanilla Extract: For classic pancake flavor.
Crafting the Perfect Gluten-Free Buttermilk Pancakes: A Step-by-Step Guide
Achieving diner-quality gluten-free buttermilk pancakes is a straightforward process, requiring attention to detail at each stage.
Step 1: Prepare the Dry Ingredients
In a large mixing bowl, thoroughly whisk together the gluten-free flour blend, xanthan gum (if using), baking soda, baking powder, salt, sugar, and vanilla powder (if using). Ensure all ingredients are well combined and free of clumps. This thorough mixing is vital for preventing unevenly risen pancakes.

Step 2: Prepare the Wet Ingredients
In a separate bowl or a large measuring cup, whisk together the buttermilk, melted butter, and eggs until the mixture is very smooth and well-emulsified. It is recommended to have the buttermilk and eggs at room temperature to facilitate even and smooth incorporation. Ensure the butter is fully melted; even slightly soft butter can result in a batter that is too thick to pour evenly.
Step 3: Combine Wet and Dry Ingredients
Gradually pour the whisked wet ingredients into the bowl containing the dry ingredients. Whisk gently until just combined and smooth. The batter should be a pale yellow color, and when you lift the whisk, it should leave a visible trail. The consistency will be thicker than that of classic gluten-free pancakes due to the higher ratio of dry ingredients and eggs. Avoid overmixing, as this can lead to tough pancakes.

Step 4: Heat the Cooking Surface
While preparing the batter, preheat your cooking surface. An electric skillet set to 350°F (175°C) or a nonstick pan over medium heat is ideal. Once the surface is warm, lightly grease it with butter or cooking spray to prevent sticking and ensure even browning.
Step 5: Portion the Batter
Using a ladle or a 1/4 cup measuring cup, pour the batter onto the hot, greased griddle. For standard-sized pancakes, you can use the bottom of the ladle or cup to gently spread the batter into a 4-inch round. For extra-tall pancakes, you can forgo spreading the batter, allowing it to form a thicker disc. These will require a slightly longer cooking time on each side.

Step 6: Cook the First Side
Allow the pancakes to cook undisturbed for approximately 3 minutes. They are ready to flip when the edges appear set, with no wet batter visible within about a 2-inch perimeter. You should also observe bubbles breaking through the surface, indicating that the pancakes are cooking through evenly. This visual cue helps prevent pancakes with undesirable "feet."
Step 7: Finish Cooking
Using a wide, flat spatula, carefully flip the pancakes. Continue to cook on the second side until lightly golden brown. Gently press down on each pancake with the spatula after flipping to ensure the entire surface makes contact with the hot griddle for even browning.

Step 8: Serve and Enjoy
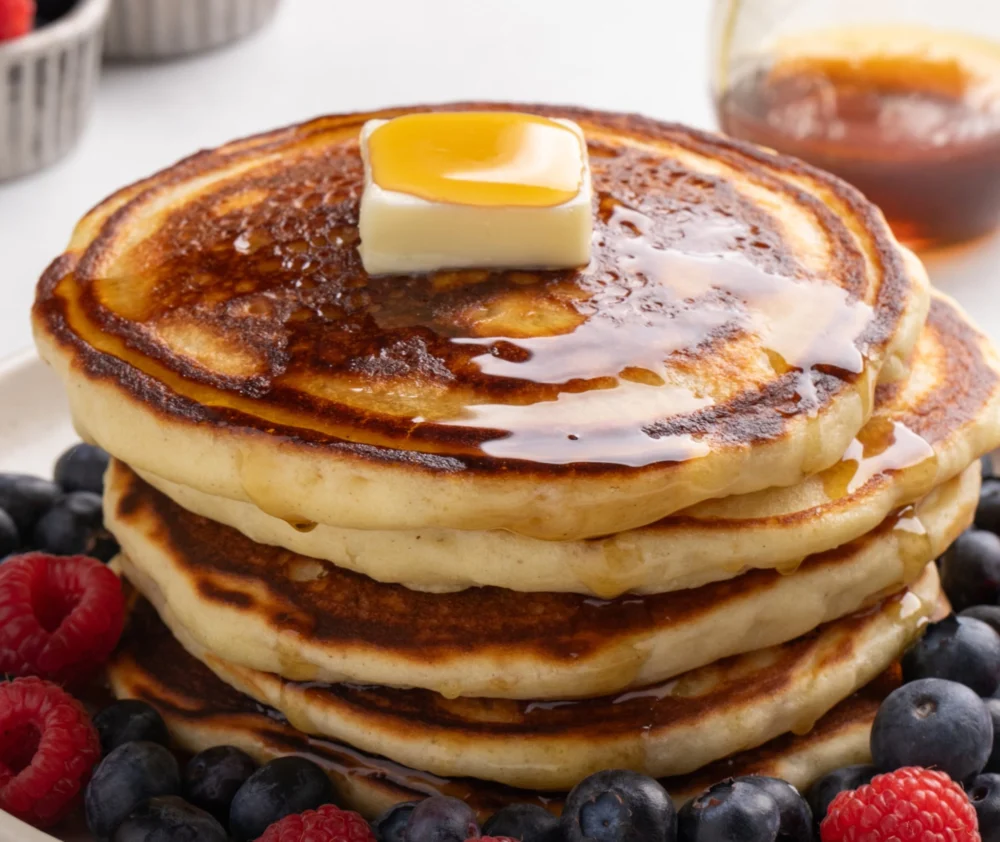
Transfer the cooked pancakes to a plate. For optimal enjoyment, serve immediately with your favorite toppings, such as butter, maple syrup, fresh berries, or whipped cream.
Adapting the Recipe: Dairy-Free and Egg-Free Options
Recognizing the diverse dietary needs of consumers, this recipe offers adaptable solutions for dairy-free and egg-free preferences.

Dairy-Free Adaptations
For those avoiding dairy, several substitutions can be made. In place of butter, opt for a block-style vegan butter, such as Melt or Miyoko’s brand. While Earth Balance buttery sticks can sometimes introduce too much moisture in baking, they are generally suitable here, though it’s advisable to omit the added salt as they are often high in sodium.
To replicate buttermilk, a combination of half unsweetened non-dairy milk (coconut milk in a carton is a good option due to its similar consistency to cow’s milk) and half dairy-free sour cream or plain Greek-style yogurt by volume can be used.

Egg-Free Adaptations
The eggs play a significant role in the structure and rise of these pancakes. While egg replacements can be used, the results may vary. Consider using two "chia eggs" (1 tablespoon chia seeds mixed with 3 tablespoons water, allowed to sit for 5-10 minutes), a liquid egg replacement like Just Egg from the refrigerated section, or a commercial egg replacer such as Bob’s Red Mill’s offering. It is important to note that the height and structure of the pancakes may be slightly compromised when using egg substitutes.
Nutritional Considerations and Storage
Each pancake, based on the provided recipe, is estimated to contain approximately 152 calories, with 23g carbohydrates, 5g protein, and 6g fat. These figures are approximations and can vary based on specific ingredient choices and portion sizes.

Pancakes are best enjoyed fresh off the griddle. For larger batches or when working with a limited cooking surface, pre-cooked pancakes can be kept warm on a sheet pan in a low oven (around 200°F or 93°C).
Leftover pancakes that have completely cooled can be stored in an airtight container or tightly wrapped in plastic wrap. Stacking them in batches of two or three in the refrigerator will keep them fresh for up to two days, while freezing them for up to three months is also an option. To reheat frozen pancakes, microwave for approximately 15 seconds, lightly sprinkle with lukewarm water, and then refresh them in a toaster or warm oven until heated through.

Conclusion
These gluten-free buttermilk pancakes offer a delectable and accessible way to enjoy a classic breakfast favorite without compromise. By understanding the role of key ingredients and following these simple steps, anyone can create a stack of fluffy, flavorful, and impressively tall pancakes that rival those found in traditional diners. The adaptability of the recipe further ensures that individuals with dietary restrictions can partake in this comforting culinary experience.
