
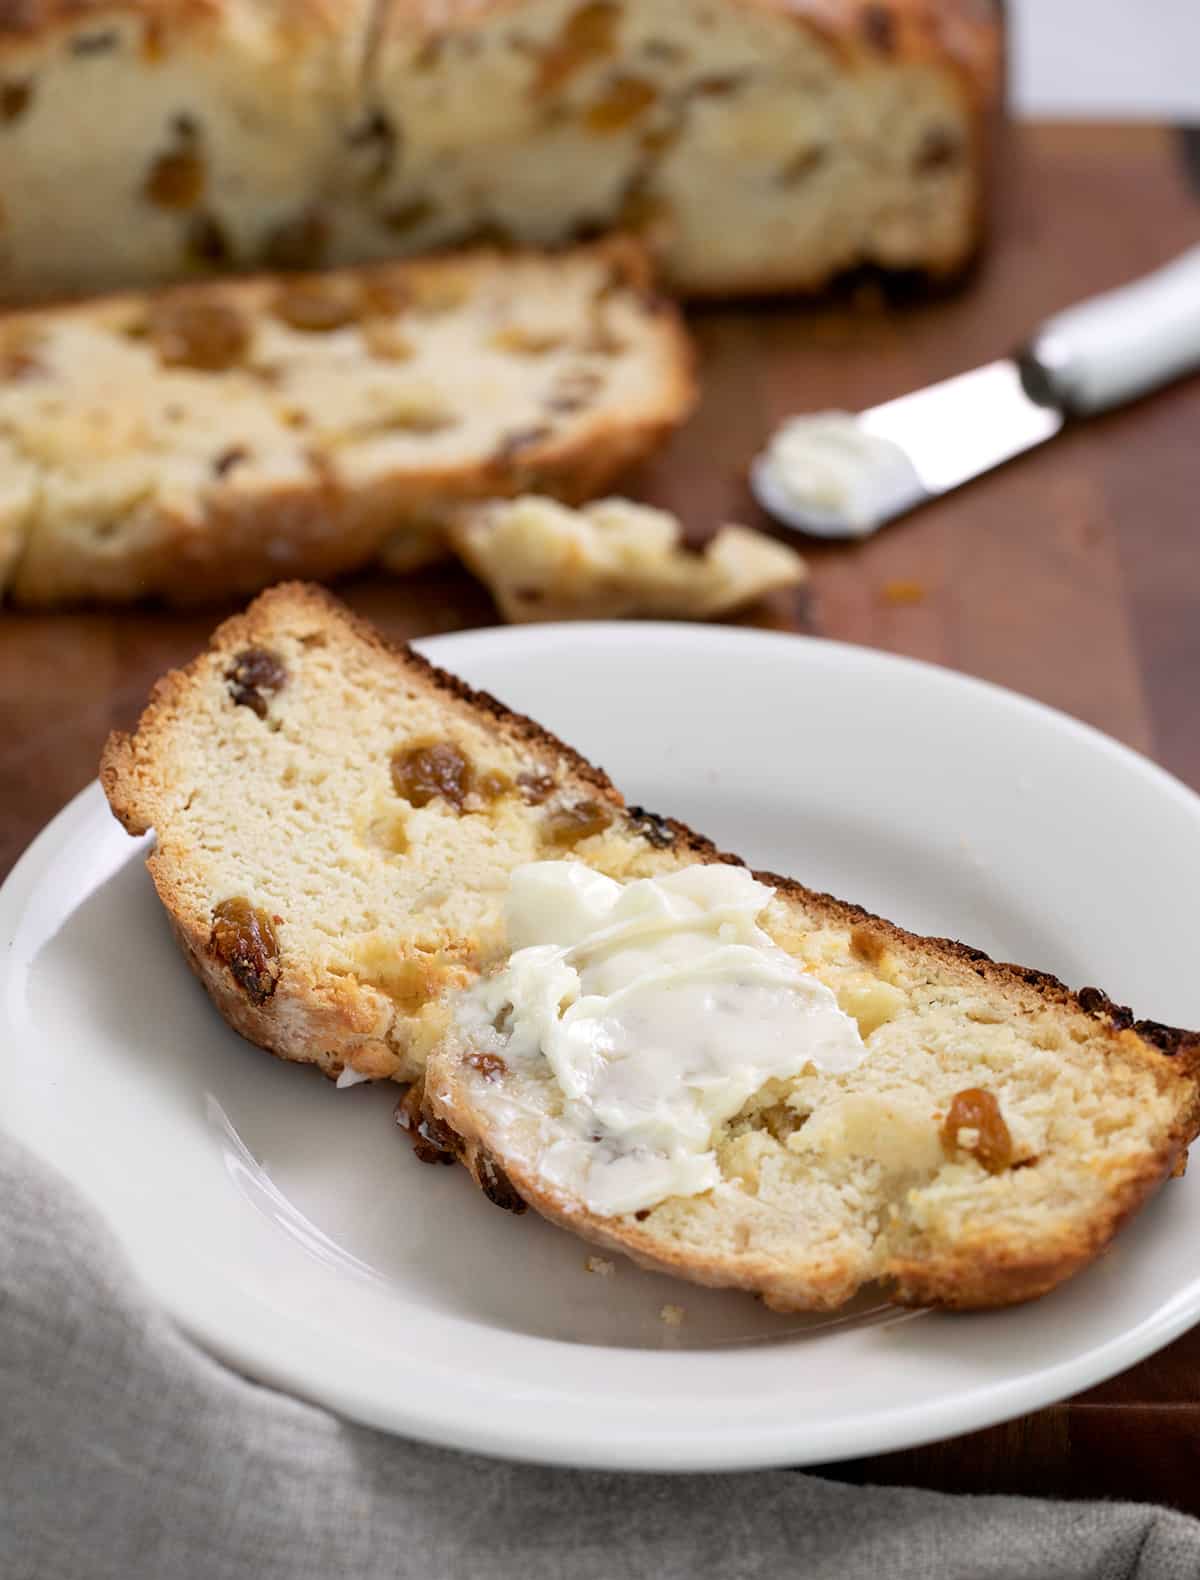
This gluten-free Irish soda bread offers a lightly sweet, golden-brown delight, best enjoyed with a generous spread of Irish butter. Whether celebrating St. Patrick’s Day or simply craving a comforting classic, this recipe aims to evoke cherished culinary memories for those adhering to a gluten-free lifestyle.
The Enduring Appeal of Soda Bread
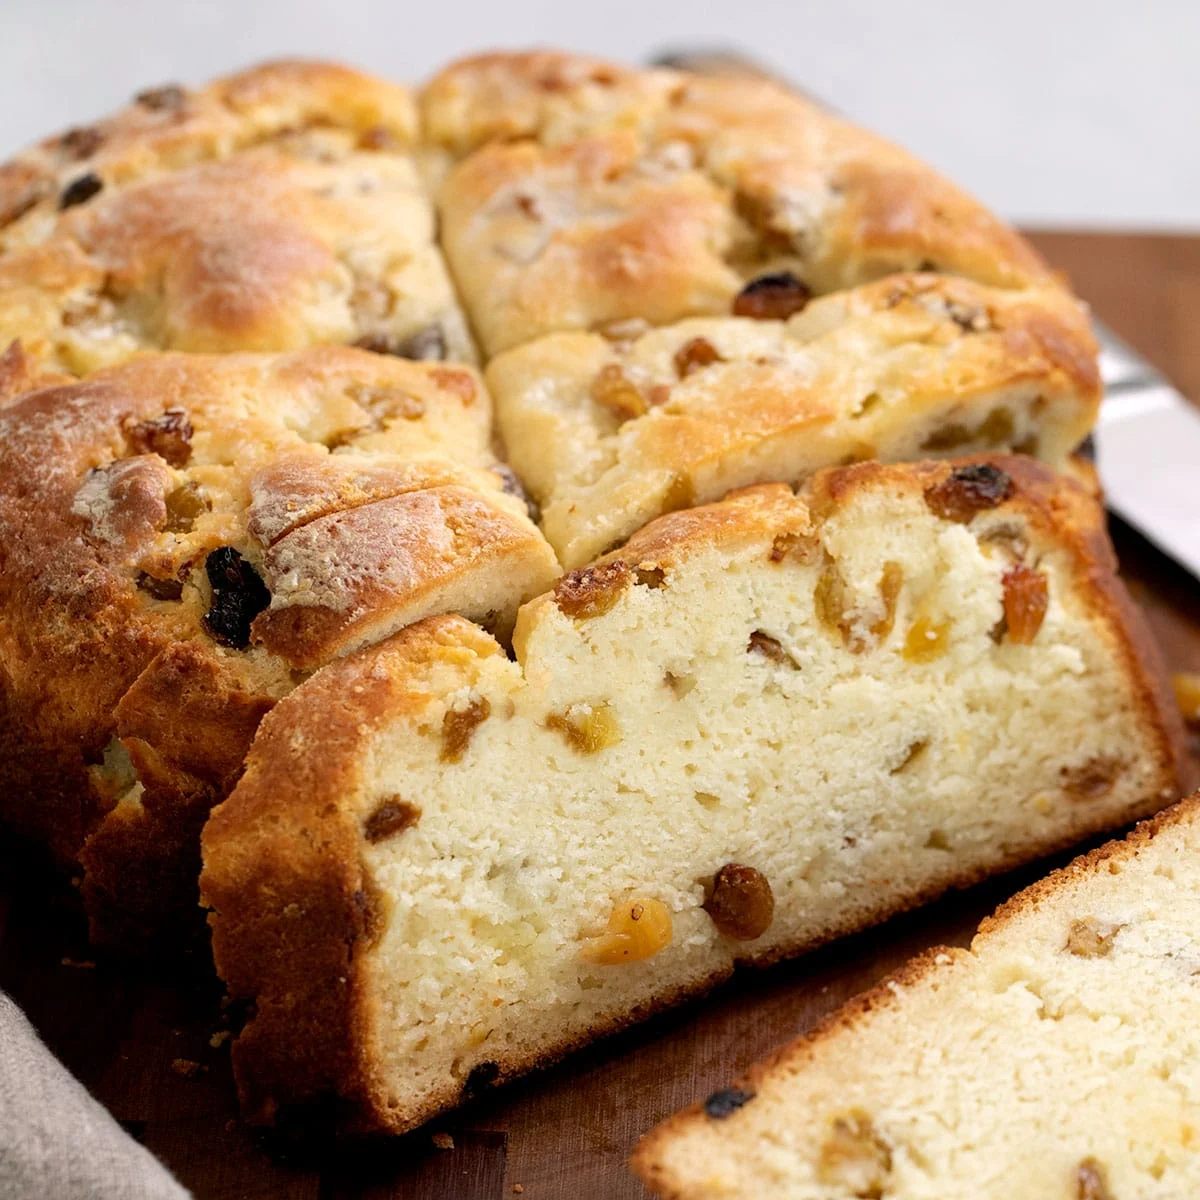
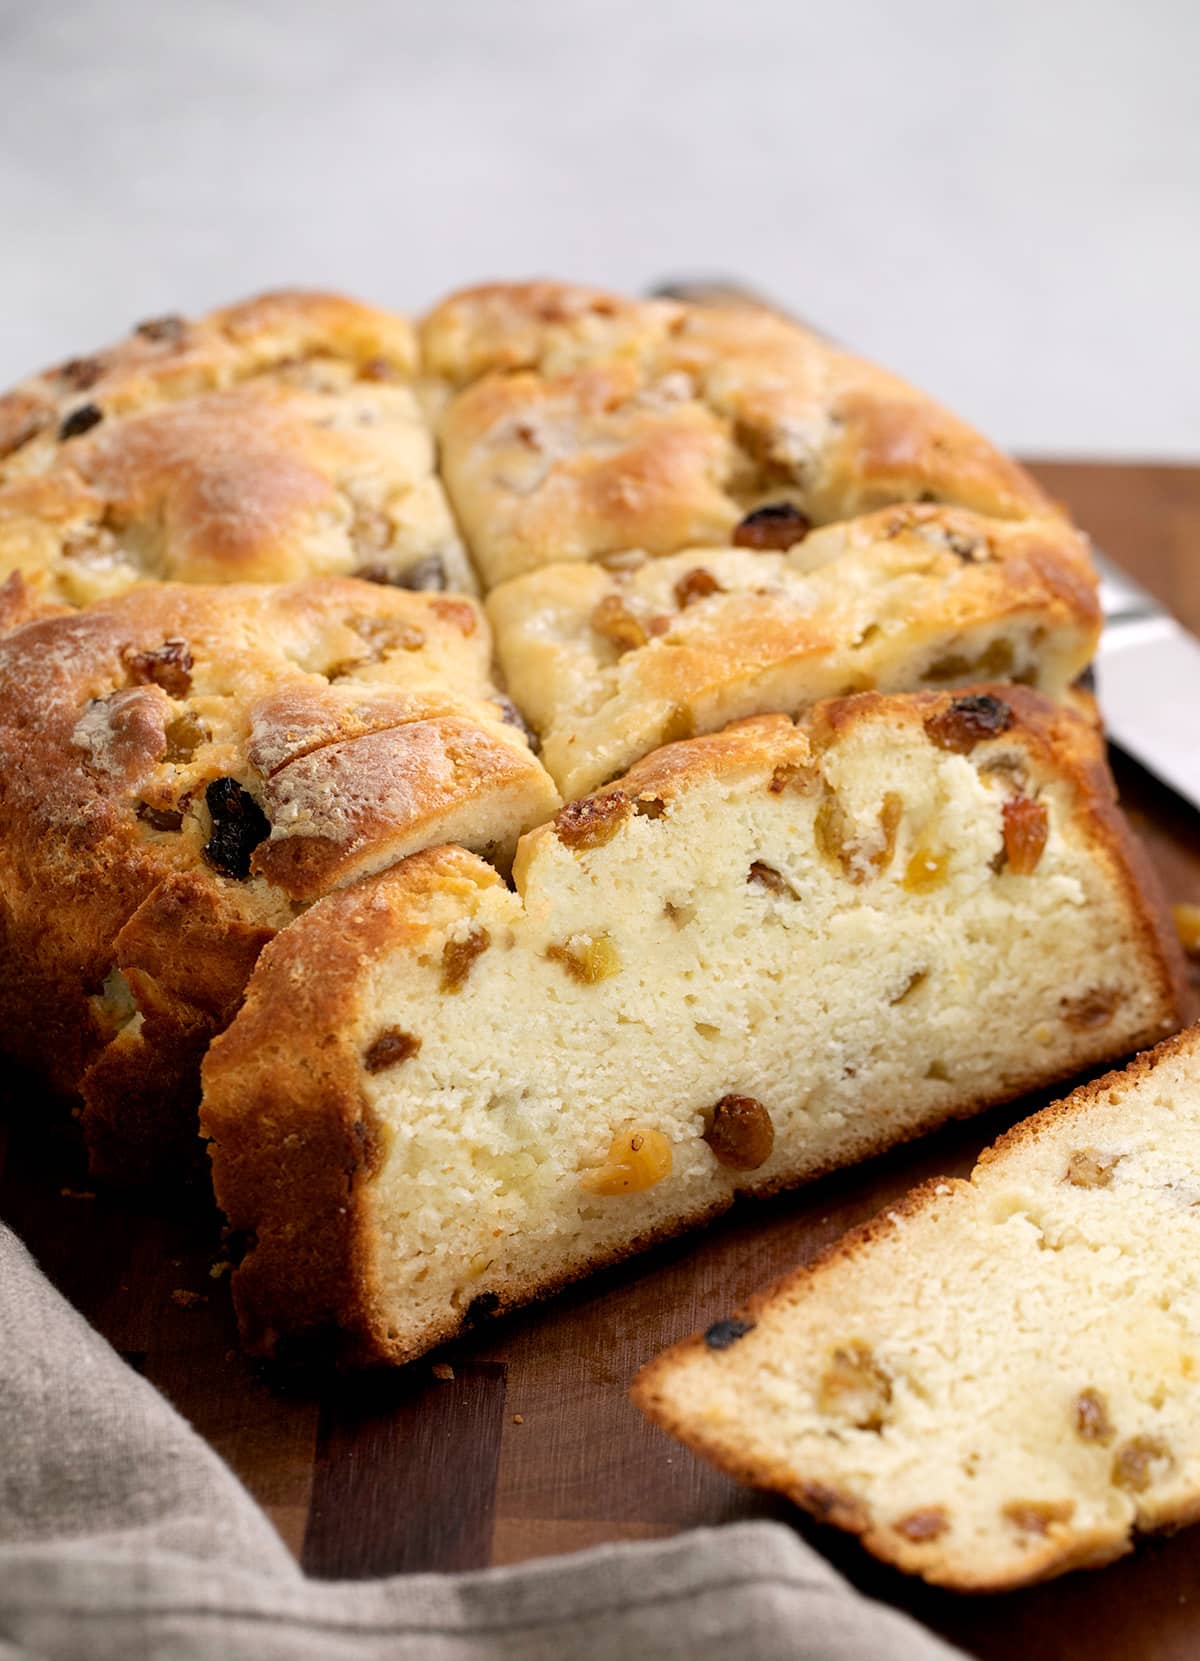
Irish soda bread is a staple in Irish baking, distinguished by its use of baking soda as a leavening agent rather than yeast. This fundamental difference classifies it as a "quick bread," meaning it requires significantly less preparation and rising time compared to traditional yeast-leavened loaves. Unlike many quick breads, soda bread is typically baked as a round, free-form loaf, often scored with a cross on top. This distinctive scoring tradition, while now largely symbolic, historically served the practical purpose of allowing steam to escape during baking, ensuring an even cook. Folklore also suggests the cross was intended to ward off evil spirits or to bless the bread.
The recipe presented here emphasizes techniques that contribute to a tender, buttery crumb, echoing the desired texture of traditional soda bread. Key to achieving this is the use of cold ingredients, particularly butter and buttermilk. By incorporating cold butter, which is often grated or cut into small pieces, bakers create pockets of fat within the dough. As the bread bakes, these pockets melt, releasing steam and contributing to a light, flaky texture. Similarly, chilled buttermilk provides the necessary liquid and acidity to activate the baking soda, crucial for the bread’s rise. The advice to handle the dough minimally is paramount; overworking the dough can develop gluten (even in gluten-free blends), leading to a tougher texture, and can also prematurely melt the butter.
This particular recipe was developed with a specific need in mind: ensuring a child could partake in a traditional classroom celebration. The creation of this gluten-free version in 2015 stems from a desire to provide an inclusive culinary experience, allowing individuals with gluten sensitivities to enjoy a beloved cultural treat alongside their peers. The goal is to recapture the essence of nostalgic baking, making it accessible to everyone, including family members and friends who follow a gluten-free diet.
Key Ingredients and Their Roles
The success of this gluten-free Irish soda bread hinges on the precise combination and preparation of its ingredients:
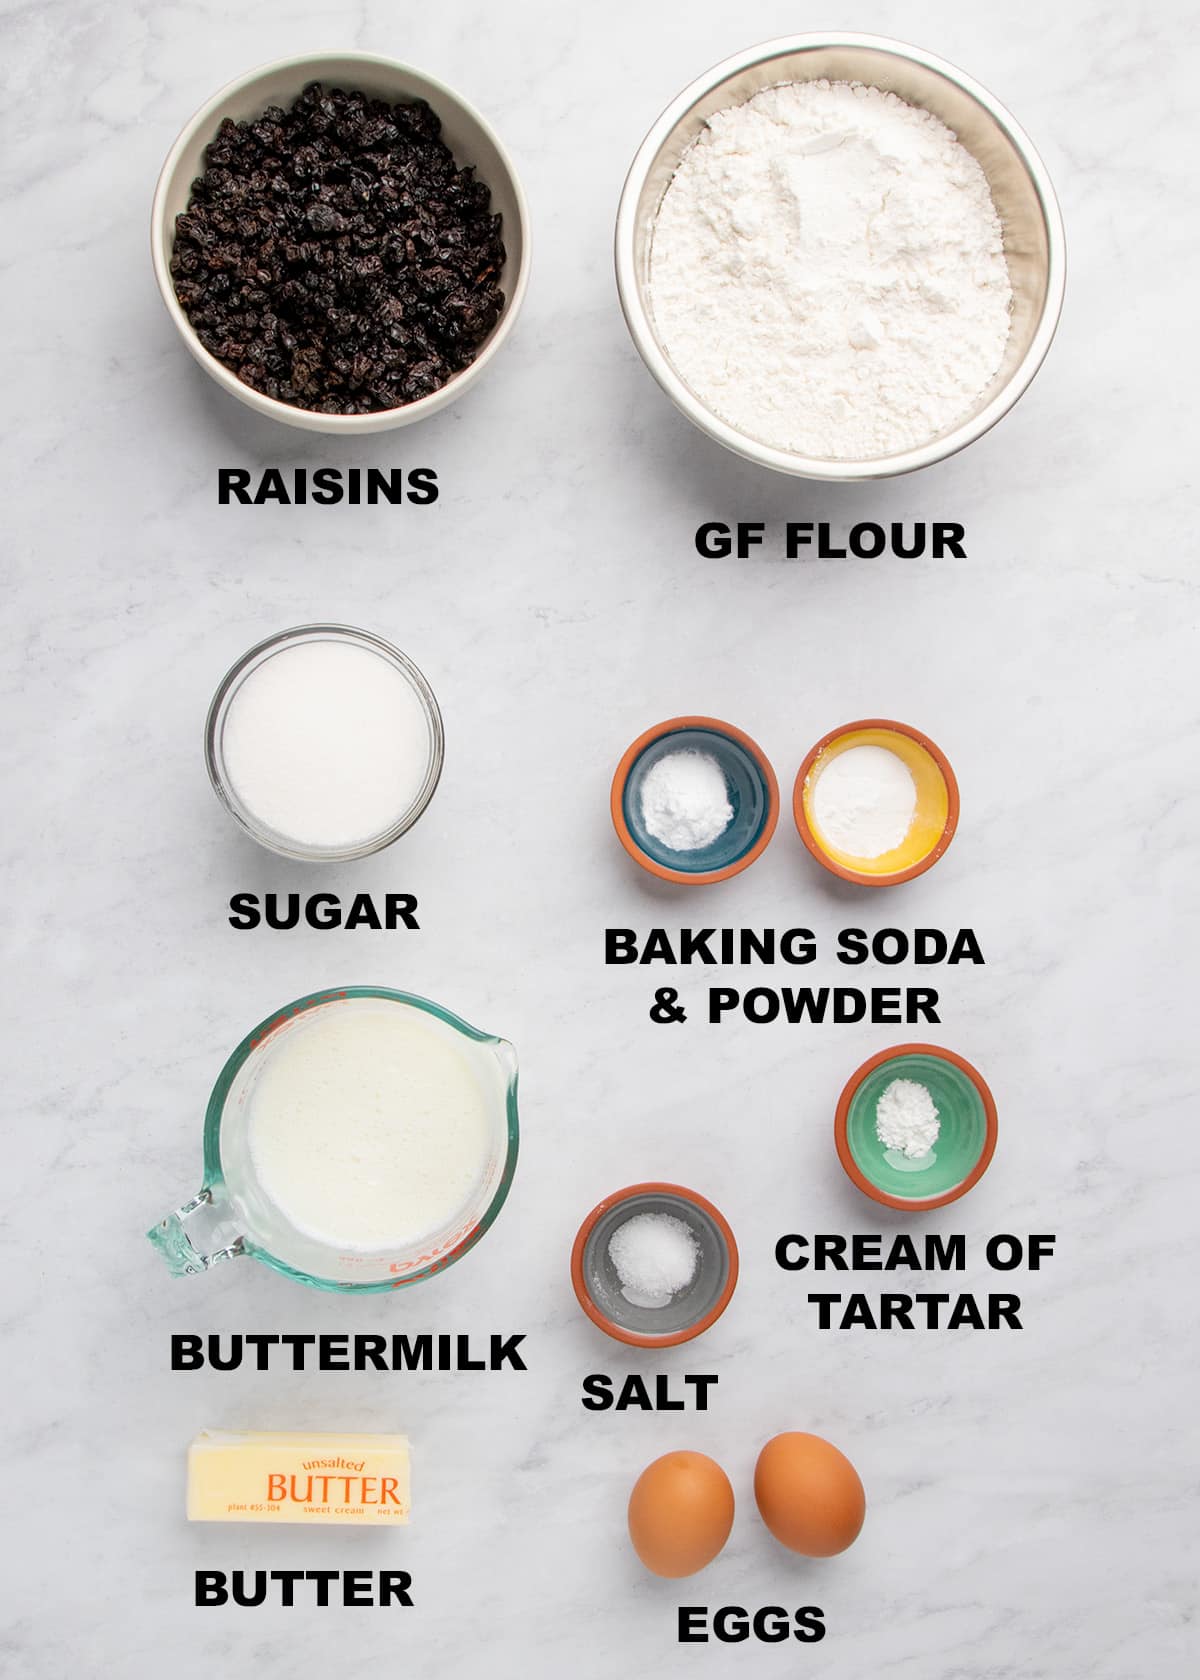
- Gluten-Free Flour Blend: A high-quality, all-purpose gluten-free flour blend is essential. Blends that already contain xanthan gum are often convenient, but it’s important to verify the amount. Some blends may require an additional small amount of xanthan gum to achieve the proper structure and binding that gluten typically provides. For instance, while Bob’s Red Mill 1-to-1 Gluten Free Baking Flour is a popular choice, it might benefit from an extra 3/4 teaspoon of xanthan gum to ensure optimal results in this recipe. Alternatively, bakers can create their own custom blends.
- Baking Soda and Baking Powder: These chemical leaveners are critical for the bread’s rise. Baking soda, an alkali, reacts with acidic ingredients (like buttermilk) to produce carbon dioxide gas, causing the dough to expand. Baking powder, a double-acting leavener, provides an additional boost.
- Salt and Cream of Tartar: Salt enhances the overall flavor profile of the bread. Cream of tartar, an acidic salt, works in conjunction with baking soda to aid in leavening and can also contribute to a tender crumb.
- Sugar: A modest amount of sugar is included to impart a subtle sweetness, balancing the tang of the buttermilk and complementing the richness of the butter. This differentiates it from a savory soda bread and aligns it with a slightly sweeter, pastry-like profile.
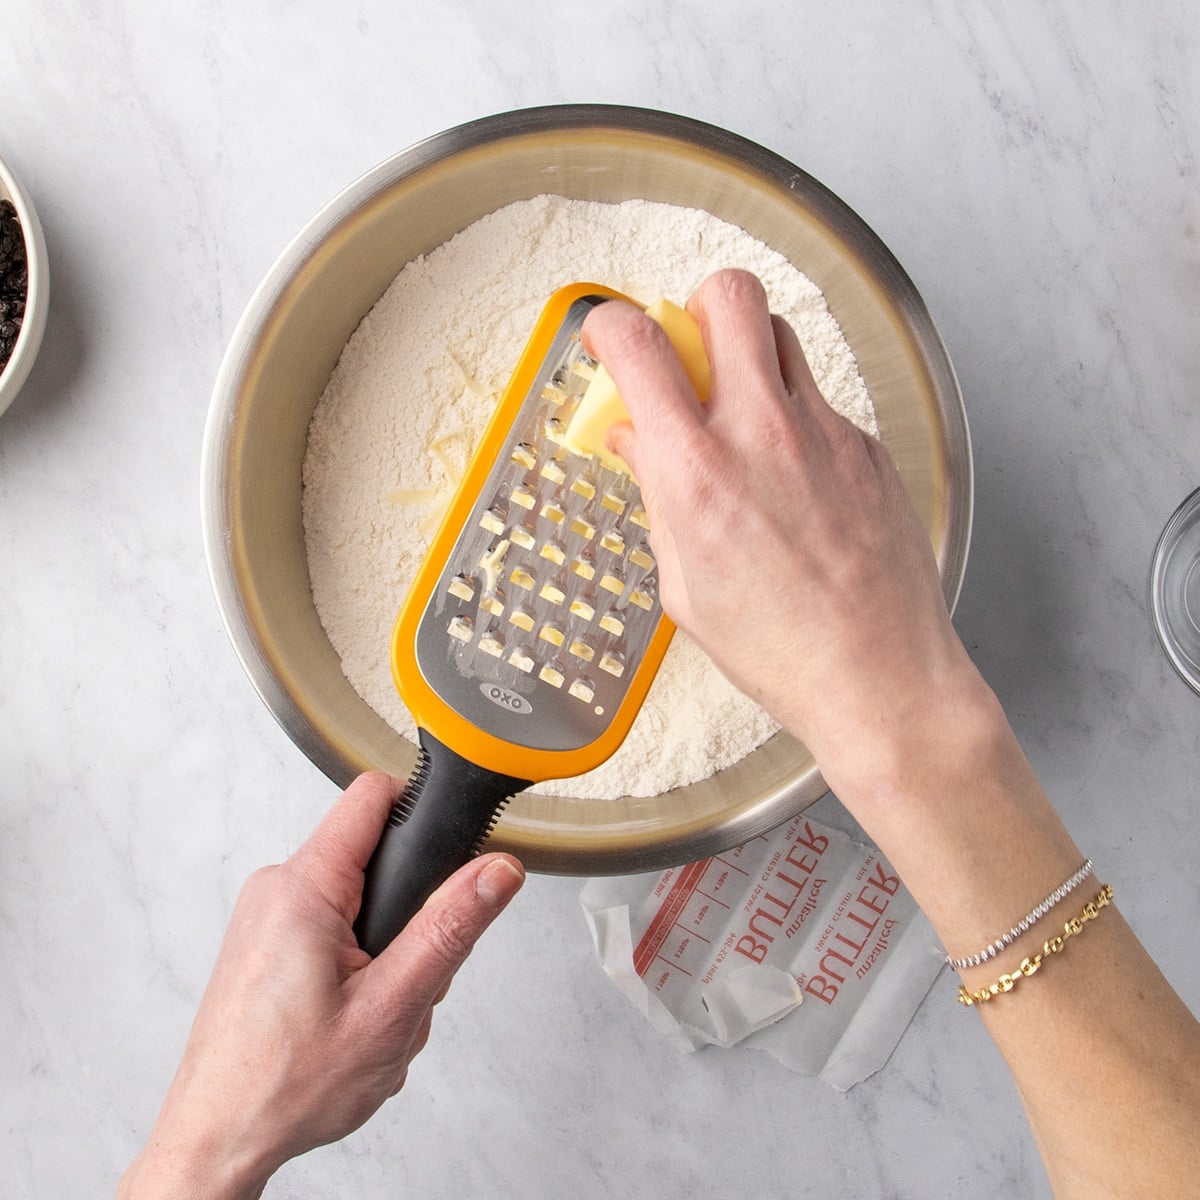
- Cold Butter: As mentioned, cold butter is key. When grated or cut into small, uniform pieces, it creates distinct fat pockets within the dough. These pockets melt during baking, leading to a lighter, more tender crumb. Using very cold butter, straight from the refrigerator, is crucial.
- Cold Buttermilk: Real buttermilk is preferred due to its thickness and acidity. The acidity is vital for activating the baking soda, and its thicker consistency contributes less moisture than regular milk, preventing the dough from becoming too wet. If genuine buttermilk is unavailable, effective substitutes include plain low-fat kefir, or a mixture of plain Greek-style yogurt or sour cream with whole milk. The ratio of these substitutes should mimic the consistency and acidity of traditional buttermilk.
- Eggs: Eggs provide structure, richness, and binding to the dough. They also contribute to the bread’s golden hue.
- Raisins (or other dried fruit/nuts): Raisins are a classic addition, offering bursts of sweetness and chewiness throughout the bread. Alternatives like currants, chopped dried apricots, or prunes can be used. For a different flavor profile, chopped raw unsalted walnuts or pecans can be incorporated, though this may require a slight adjustment in the liquid content, as nuts tend to absorb moisture. Omitting the raisins will result in a slightly smaller loaf and potentially a shorter baking time.
The Process: Crafting the Perfect Loaf
The creation of gluten-free Irish soda bread is a straightforward process, suitable for bakers of all levels. The key lies in careful handling of the ingredients.
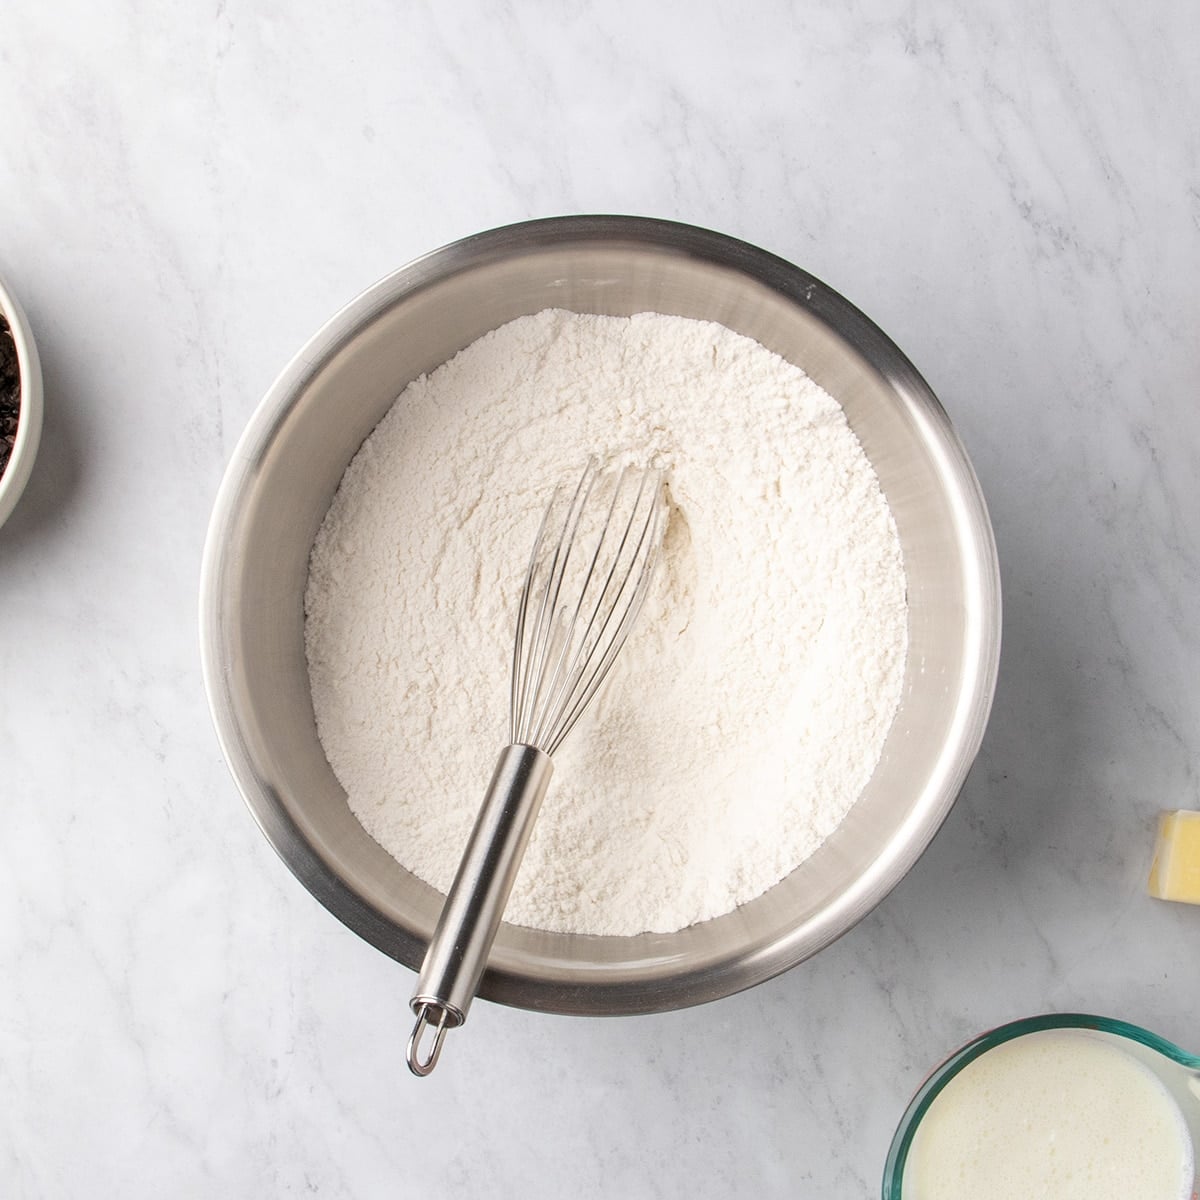
- Combine Dry Ingredients: In a large mixing bowl, thoroughly whisk together the gluten-free flour blend, xanthan gum (if needed), baking powder, baking soda, salt, cream of tartar, and sugar. This ensures that the leavening agents are evenly distributed, preventing pockets of unmixed ingredients that could lead to uneven rising or a bitter taste.
- Incorporate Cold Butter: Begin with very cold butter. Grate the butter directly into the bowl of dry ingredients. Alternatively, dice the butter and then work it into the dry ingredients using your fingertips until it resembles coarse crumbs with some larger, pea-sized pieces of butter remaining. This step is critical for achieving the desired flaky texture.
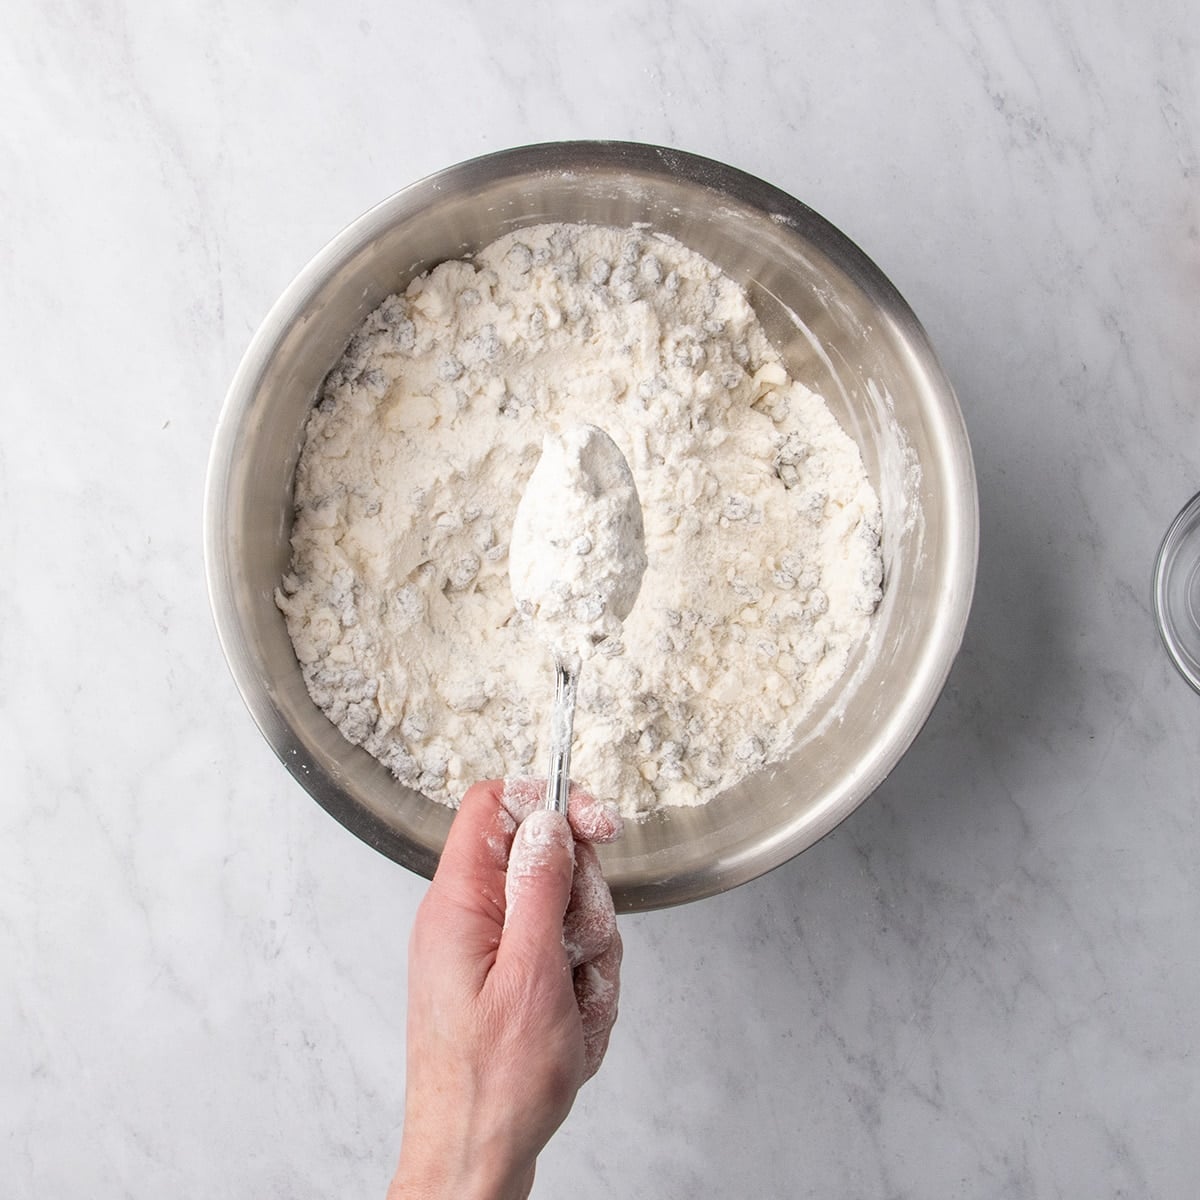
- Add Raisins: Gently fold in the raisins or other chosen additions, ensuring they are evenly distributed throughout the dry mixture. At this stage, the mixture will appear dry and somewhat clumpy, which is expected.
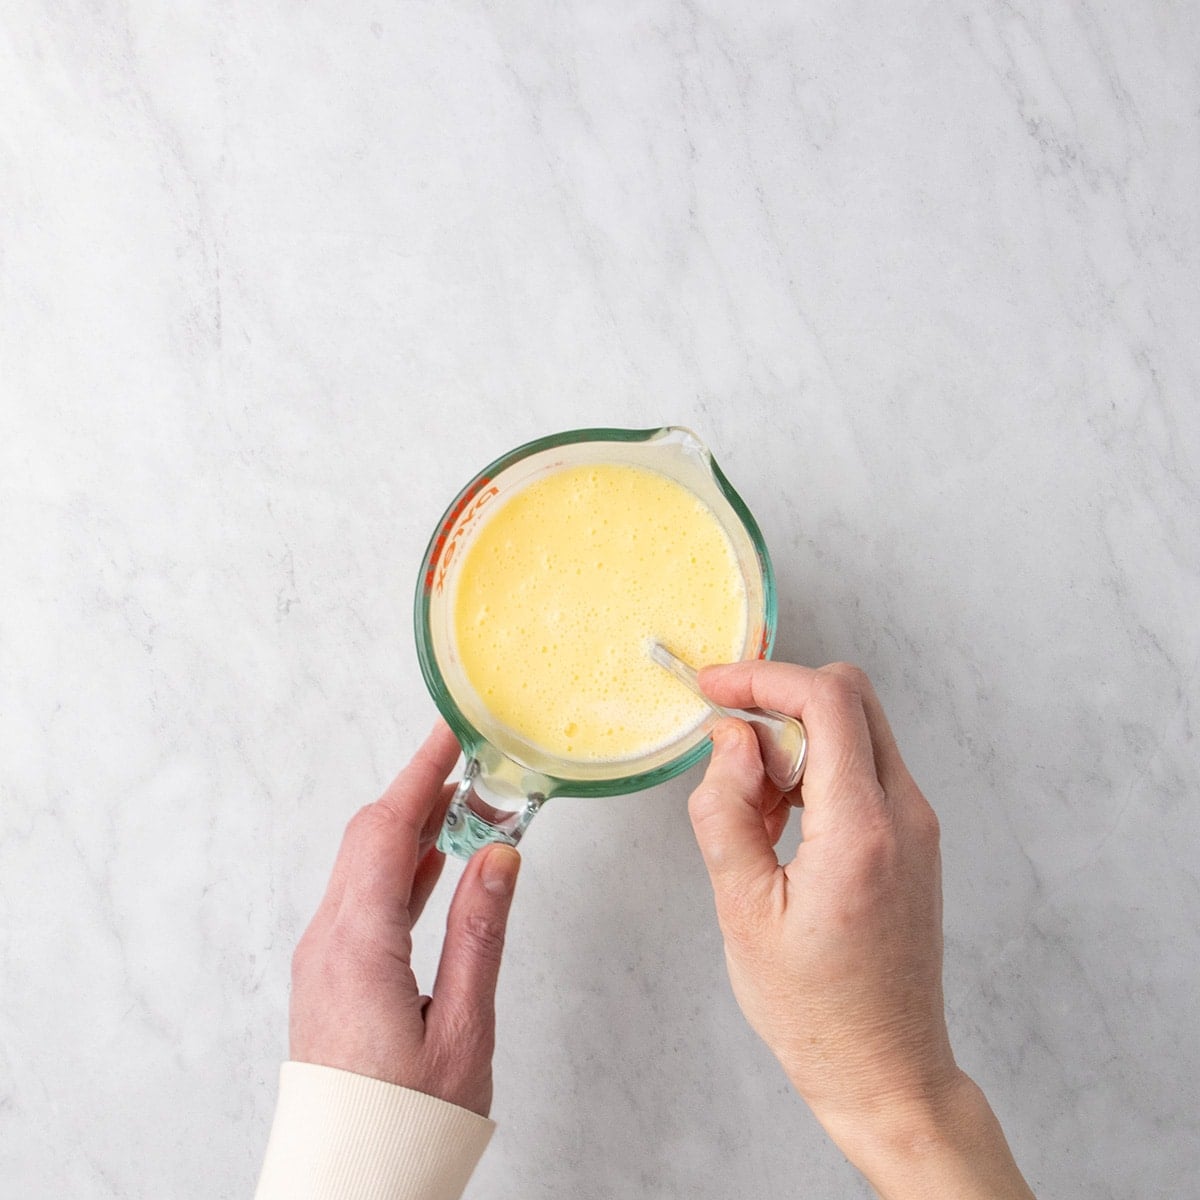
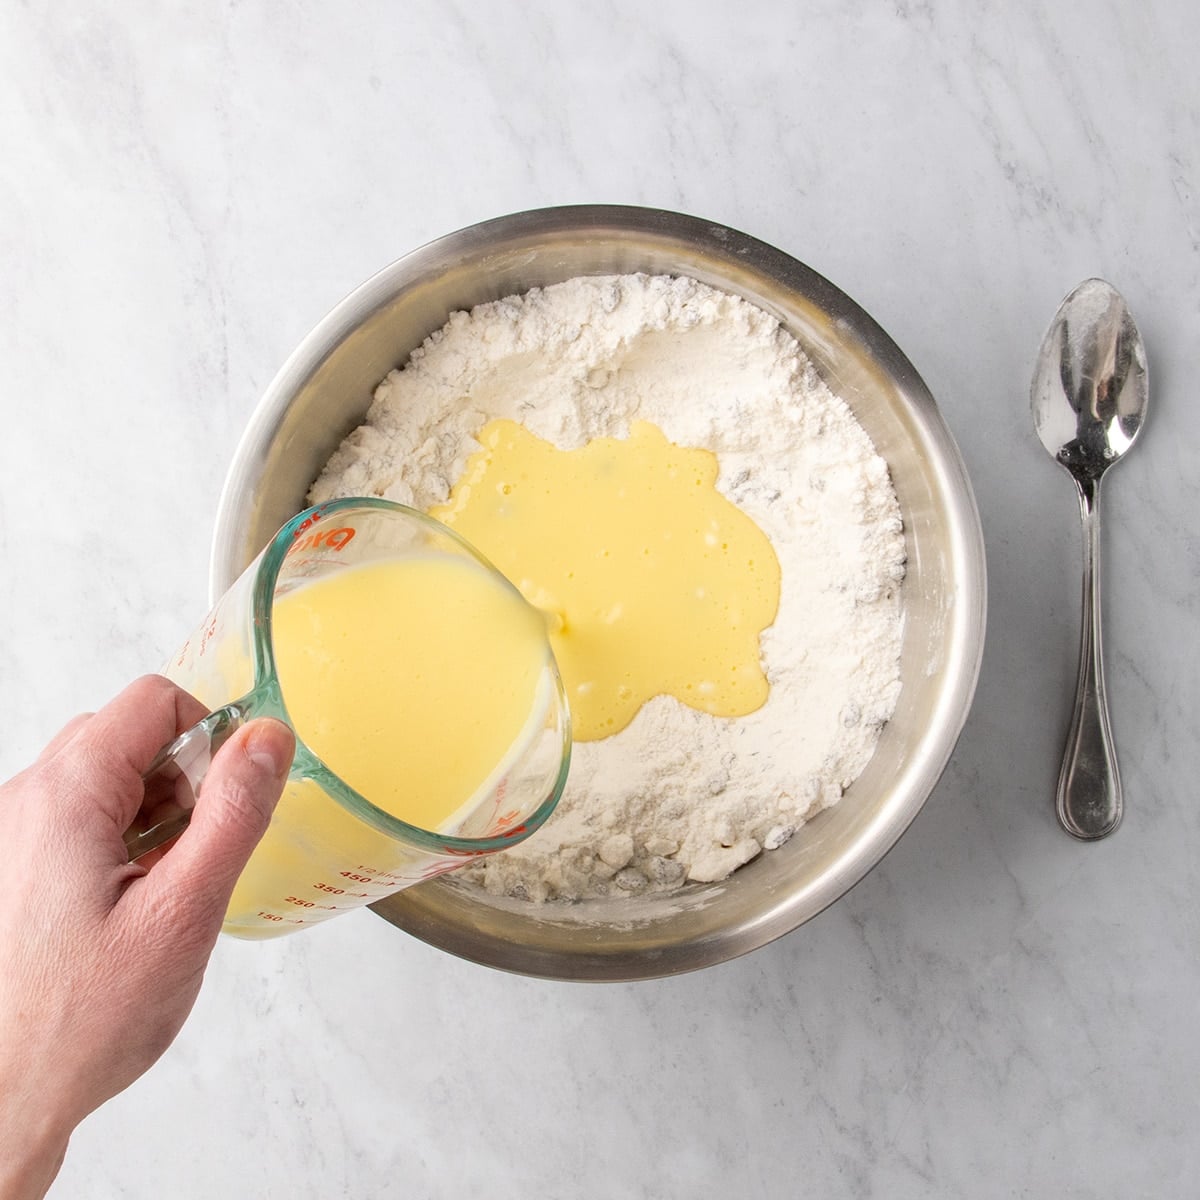
- Whisk Wet Ingredients: In a separate, smaller bowl or measuring cup, whisk together the cold eggs and cold buttermilk. Beat the eggs for approximately 30 seconds to fully combine the yolks and whites, creating a smooth liquid base.
- Combine Wet and Dry Ingredients: Create a well in the center of the dry ingredients in the large mixing bowl. Pour the buttermilk and egg mixture into this well. Using a mixing spoon or spatula, gently combine the ingredients until just incorporated. The goal is to bring the dough together without overmixing, which can melt the butter and toughen the bread. If there are very dry pockets of flour, add a small amount of additional buttermilk, a tablespoon at a time, to just those areas until the dough holds together. The dough should be soft and slightly sticky.
- Shape the Loaf: Turn the dough out onto a lightly floured surface. If baking in a cast-iron skillet, it’s advisable to place the dough on a piece of parchment paper for easy transfer. Gently shape the dough into a round disk, approximately 9 inches in diameter and about 2 inches high. Handle the dough as little as possible to maintain the integrity of the butter pieces.
- Score the Loaf: Using a large, sharp knife, make a deep cross or X shape into the center of the dough. The cut should be about 1 inch deep and should not extend all the way to the edges of the loaf, stopping about 1 inch from the perimeter. This scoring is essential for allowing steam to escape during baking, ensuring the bread cooks evenly through the center.
- Bake the Bread: Carefully transfer the shaped and scored loaf into a preheated oven set at 375°F (190°C). If using a baking sheet, place it directly on the center rack. If using a cast-iron skillet, place the skillet on the center rack. Bake for approximately 30-45 minutes, or until the loaf is a golden brown color, feels firm to the touch, and a skewer or toothpick inserted into the center comes out with only a few moist crumbs (not wet batter). Baking times can vary depending on the oven and baking vessel.
- Cool and Serve: Once baked, allow the loaf to cool in the pan for a few minutes until it is stable enough to be moved. Then, carefully transfer the loaf to a wire rack to cool completely. If parchment paper was used, slide it out from beneath the loaf to ensure air circulates evenly around the bottom.
Expert Tips for Success
- Maintain Cold Ingredients: The principle of keeping ingredients cold, particularly butter and buttermilk, cannot be overstated. This technique is fundamental to achieving a tender, light crumb, similar to that found in well-made gluten-free biscuits.
- Gentle Handling is Key: Avoid overworking the dough. The heat from your hands can melt the butter, compromising the texture. Mix only until the ingredients are just combined.
- Proper Buttermilk Substitution: If real buttermilk is not accessible, ensuring a proper substitute is used is vital. Simply adding acid to milk does not replicate the thickness and texture of true buttermilk. Using kefir or a yogurt/milk blend provides a closer approximation.
- The Significance of Scoring: The deep cross cut not only aids in even baking but also carries historical and cultural significance, adding a layer of tradition to the process. Ensure the cut is deep enough to penetrate the center of the loaf.
Variations and Storage
This versatile recipe allows for several substitutions to cater to different dietary needs and preferences.
- Dairy-Free Adaptations: For a dairy-free version, cold vegan butter alternatives, such as those from Melt or Miyoko’s Kitchen, can be used in place of dairy butter. For the buttermilk substitute, a blend of plain, unsweetened non-dairy yogurt (like coconut or soy) and non-dairy milk can be employed.
- Egg-Free Options: While the recipe calls for two eggs, they can potentially be replaced with egg replacers like chia eggs, Bob’s Red Mill egg replacer, or JustEgg liquid egg replacer. Flax eggs are also an option, though they may impart a slightly earthy flavor.
- Alternative Mix-ins: Beyond raisins, currants, chopped dried apricots, or prunes offer delicious alternatives. For a nuttier profile, chopped raw unsalted walnuts or pecans can be used, but be mindful that nuts absorb moisture, so a touch more buttermilk might be necessary. Omitting dried fruit entirely will affect the moisture content and potentially the baking time.
Storage: Once completely cooled, wrap leftover Irish soda bread tightly in plastic wrap or a reusable food wrap and store at room temperature for up to two days. To refresh slices, lightly mist them with lukewarm water and toast them gently. For longer storage, wrap the bread tightly in freezer-safe material and freeze for up to three months. Slicing the loaf before freezing allows for easy defrosting of individual portions.
This gluten-free Irish soda bread offers a comforting and authentic taste of tradition, making it a welcome addition to any table, especially during celebrations like St. Patrick’s Day. Its straightforward preparation and adaptable nature ensure that the joy of homemade bread is accessible to all.
