

This post may contain affiliate links. Please read our disclosure policy.
Gluten-free cheese scones have long been a sought-after treat for those avoiding gluten, offering a savory alternative to traditional baked goods. This particular recipe promises not only a rich, cheesy flavor, amplified by the quality of cheddar used, but also boasts an impressive array of flaky layers. A key innovation highlighted in this guide is an egg-free method designed to achieve remarkable height in these delicate pastries, defying common expectations for gluten-free baking.
The Science Behind the Scone’s Success
The foundation of these exceptional gluten-free cheese scones lies in a technique mirroring that of classic pastry making. The recipe emphasizes the use of large, cold pieces of butter, flattened into shards and incorporated into the flour. This method is crucial for achieving "lamination," a process where layers of dough are folded around layers of butter. When exposed to the heat of the oven, these butter layers melt and expand, creating steam that pushes the dough layers apart, resulting in the signature flaky texture.
A critical factor in this lamination process is maintaining the coldness of the butter. If the butter melts too early, it will be absorbed into the dough rather than creating distinct layers. The recipe’s recommendation to chill the dough before baking is a vital step, allowing any slightly softened butter to re-firm, ensuring it can perform its leavening magic in the oven.
Furthermore, the choice of cheese plays a significant role in the scone’s savory depth. The article strongly advises against using pre-shredded cheese, citing the presence of anti-caking agents that can compromise flavor and texture. Opting for freshly grated cheddar, particularly a high-quality variety like Tillamook, is presented as a way to maximize the umami notes and overall taste experience. The inclusion of specific brand recommendations, such as Tillamook at Trader Joe’s, provides practical guidance for home bakers seeking premium ingredients.
Essential Ingredients for Flaky Perfection
The success of any recipe hinges on the quality and precise combination of its ingredients. For these gluten-free cheese scones, a thoughtful selection ensures both flavor and structure.
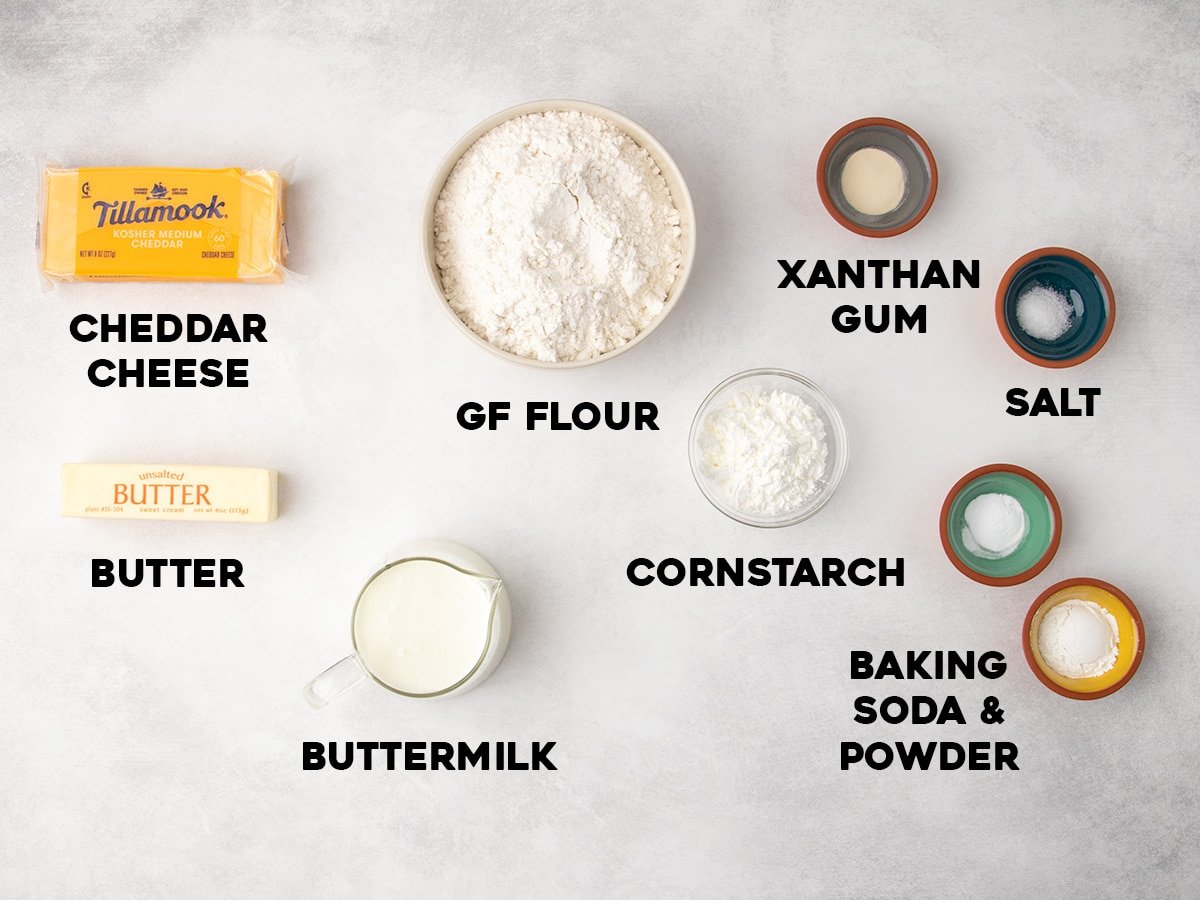
- Gluten-Free Flour Blend: The base of the scone, a well-formulated blend is essential for mimicking the structure typically provided by wheat flour. The article recommends high-quality blends that utilize superfine rice flour, such as Better Batter original blend or Nicole’s Best. For those who prefer a DIY approach, the author points to their own comprehensive guide on gluten-free flour blends, offering flexibility and customization. The note regarding Bob’s Red Mill 1-to-1 blend, suggesting an additional 1 ¼ teaspoons of xanthan gum, underscores the importance of precise binder ratios in gluten-free baking.
- Xanthan Gum: This common gluten-free baking staple acts as a crucial binder, compensating for the absence of gluten’s elastic properties. It helps to hold the ingredients together and provides structure, particularly important for achieving a good rise.
- Cornstarch: Often included in gluten-free flour blends, cornstarch contributes to a lighter texture and helps to prevent the scones from becoming too dense. The recipe notes that if using pre-shredded cheese (which contains starches), a slight adjustment to the cornstarch quantity may be necessary to maintain the desired consistency.
- Salt: A fundamental flavor enhancer, salt not only elevates the taste of the cheese but also plays a role in controlling yeast activity (though not directly applicable here, it’s a general baking principle) and strengthening the overall structure of the baked good.
- Butter: As detailed in the "Why this recipe works" section, cold, high-fat butter is paramount for creating flaky layers through lamination. Its ability to hold its shape and then melt rapidly in the oven is key to the scone’s texture.
- Cheddar Cheese: The star savory ingredient. The emphasis on freshly grated cheese highlights the importance of quality and flavor intensity.
- Buttermilk: Its acidity reacts with baking soda to provide lift and tenderness. It also contributes a subtle tang that complements the cheese.
- Baking Soda and Baking Powder: These chemical leaveners work in tandem to ensure a significant rise. Baking soda, activated by the acidic buttermilk, provides an initial burst of leavening, while baking powder offers a more sustained lift during the baking process.
- Cold Water: Used to bring the dough together, ensuring it has the right hydration without becoming sticky. The cold temperature is maintained to preserve the integrity of the butter.
A Step-by-Step Guide to Gluten-Free Cheese Scone Creation
The process of creating these gluten-free cheese scones is meticulously outlined, ensuring that even novice bakers can achieve impressive results. The detailed instructions, accompanied by illustrative photographs, demystify the techniques involved.
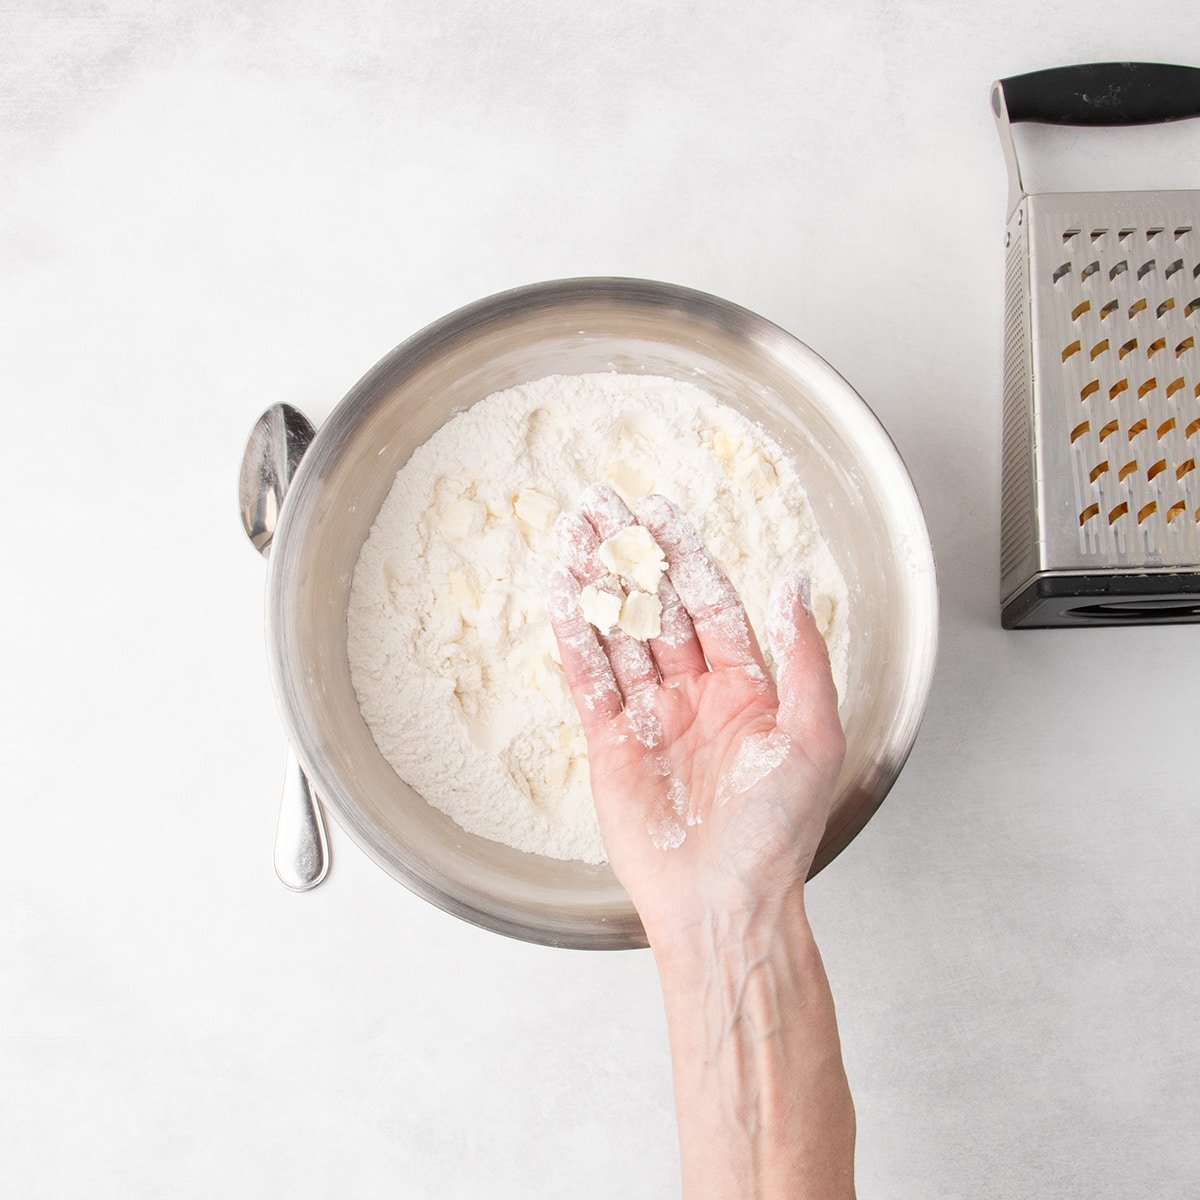
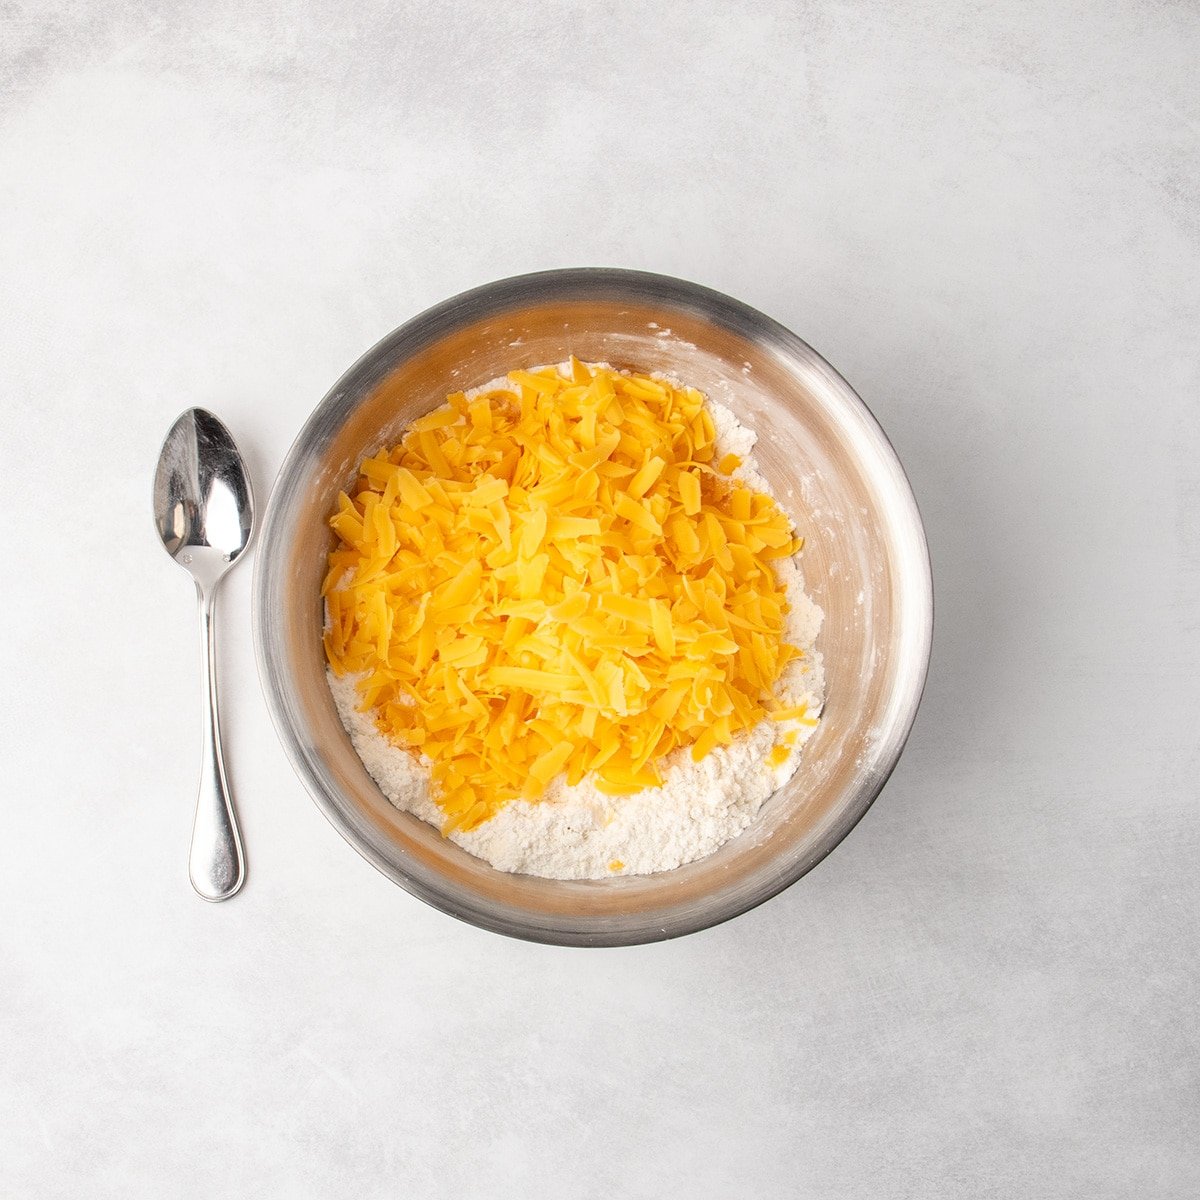
1. The Dry Foundation: The initial step involves whisking together all the dry ingredients in a single bowl. This ensures an even distribution of flour, xanthan gum, cornstarch, baking soda, baking powder, and salt, laying the groundwork for consistent texture throughout the scones.
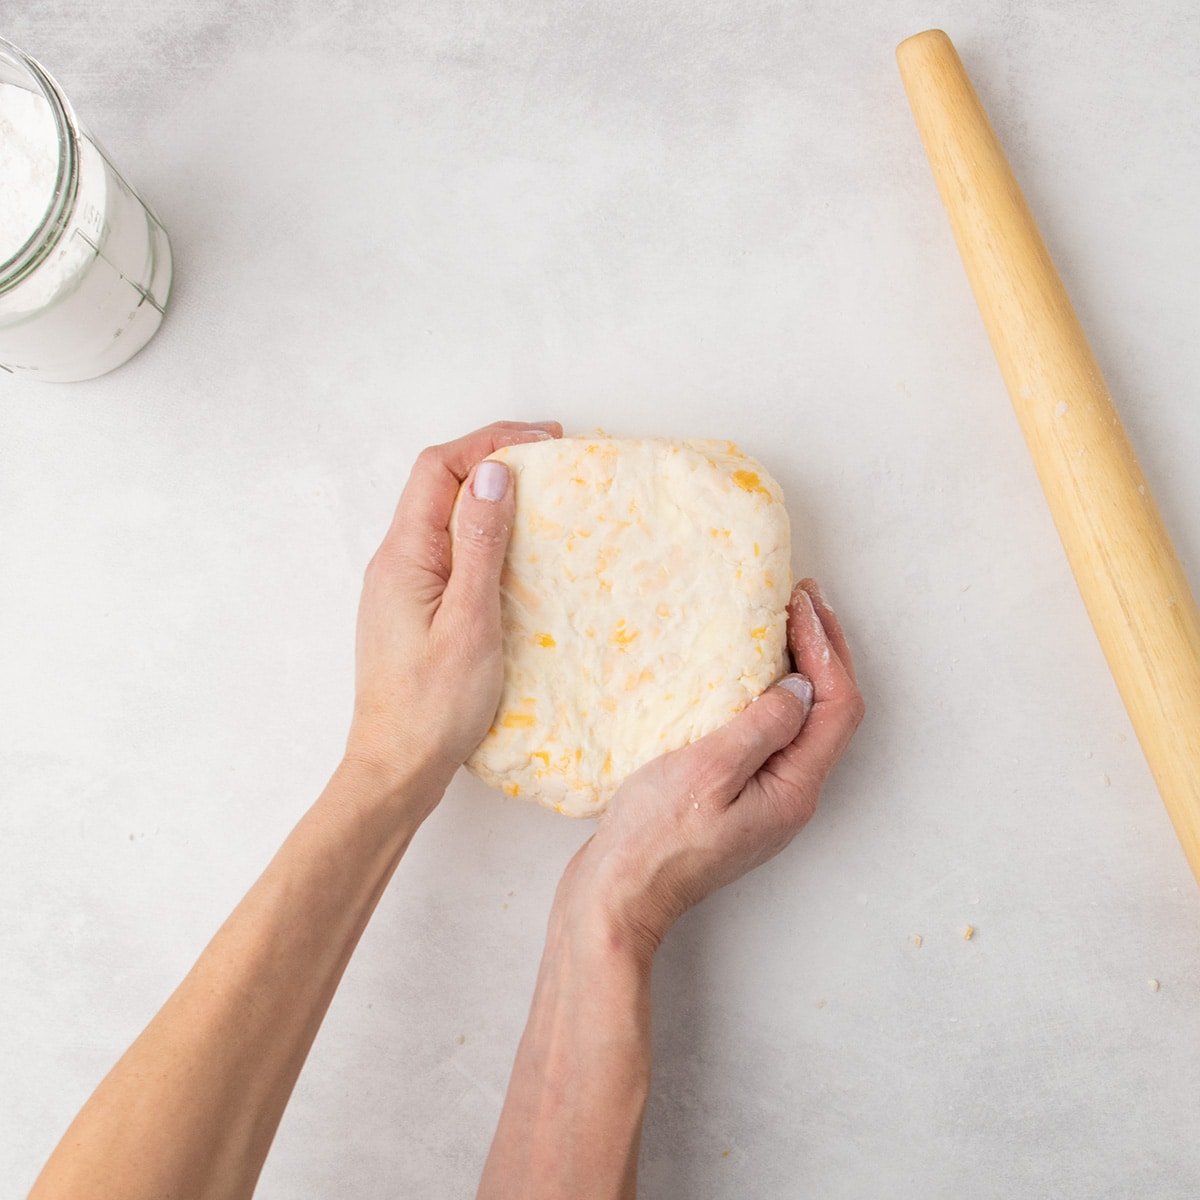
2. Incorporating Butter and Cheese: Cold, chopped butter is then added. The technique of flattening each piece of butter between the thumb and forefinger to create flat shards is crucial. This method ensures the butter remains cold and forms distinct layers within the dough. Freshly shredded cheddar cheese is then mixed in, adding its savory aroma and flavor.
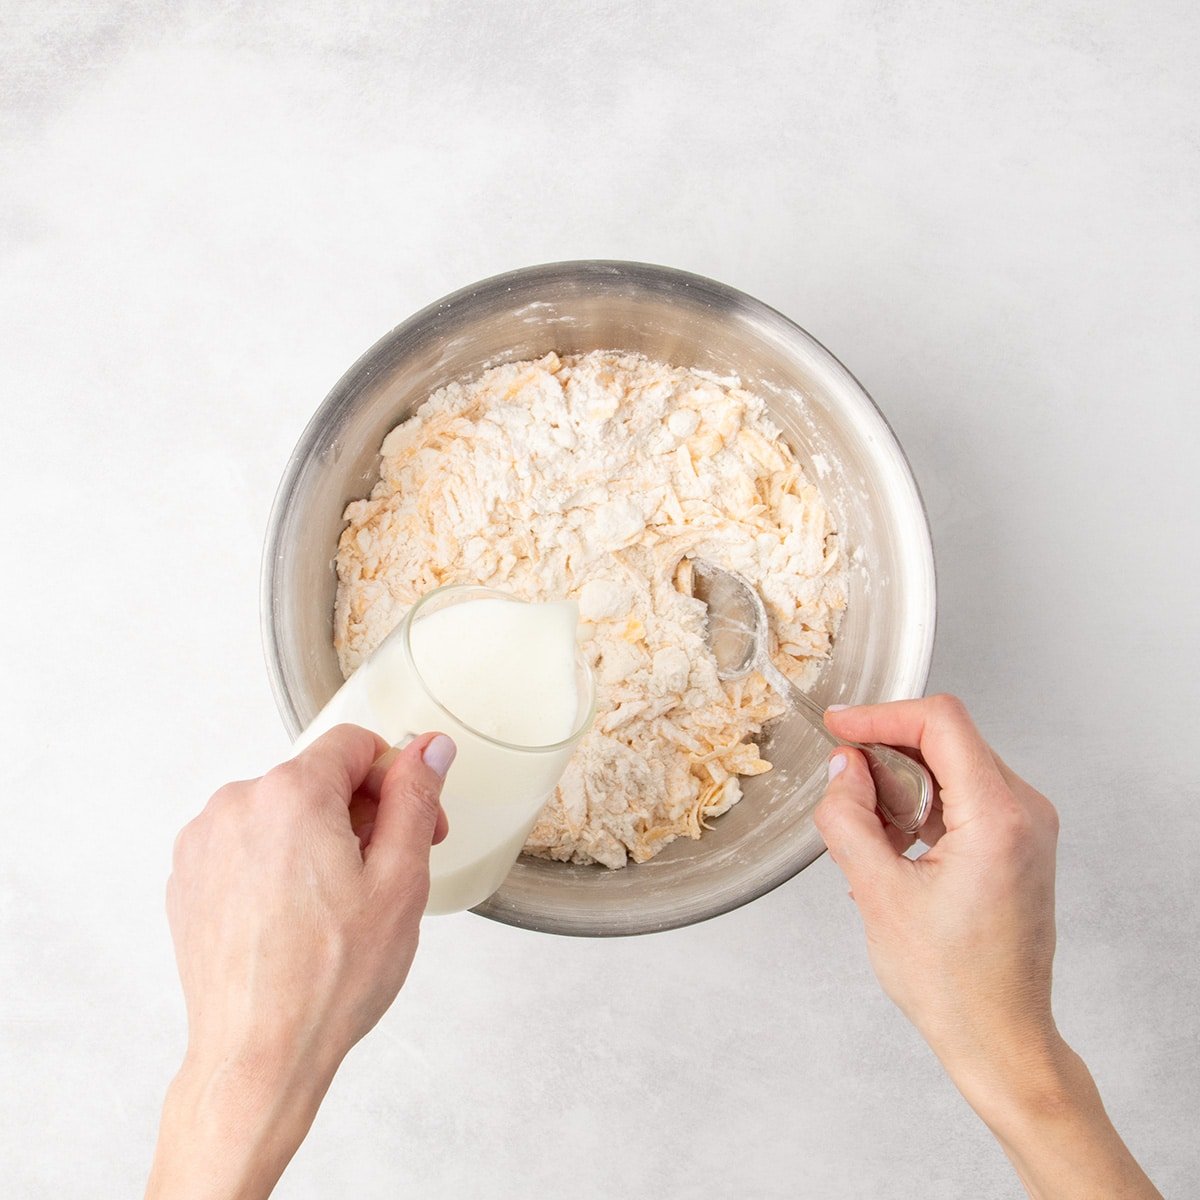
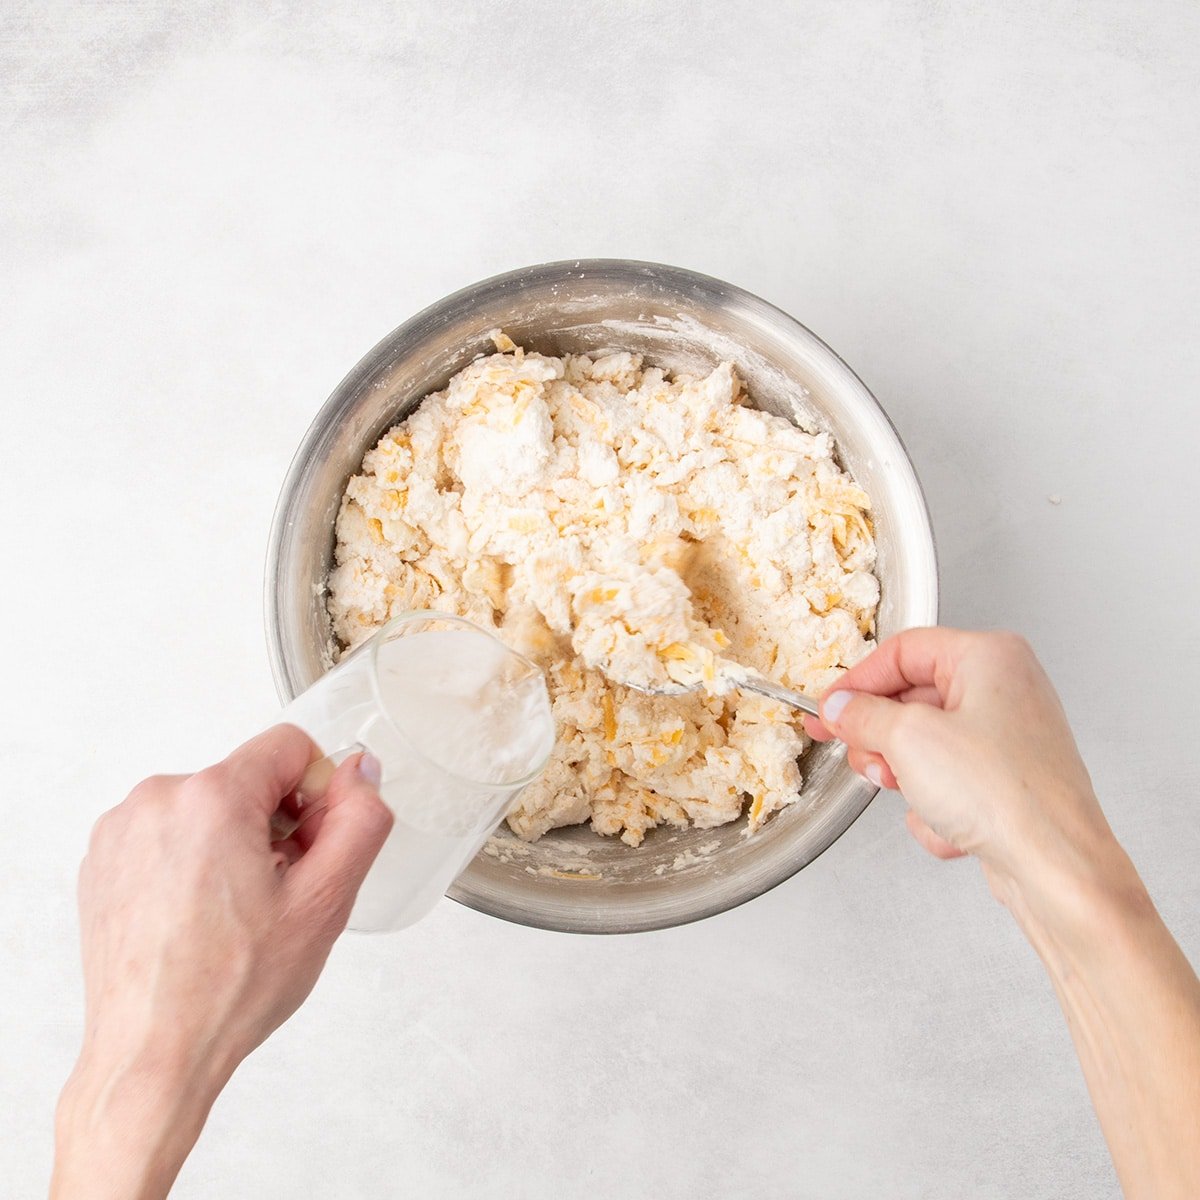
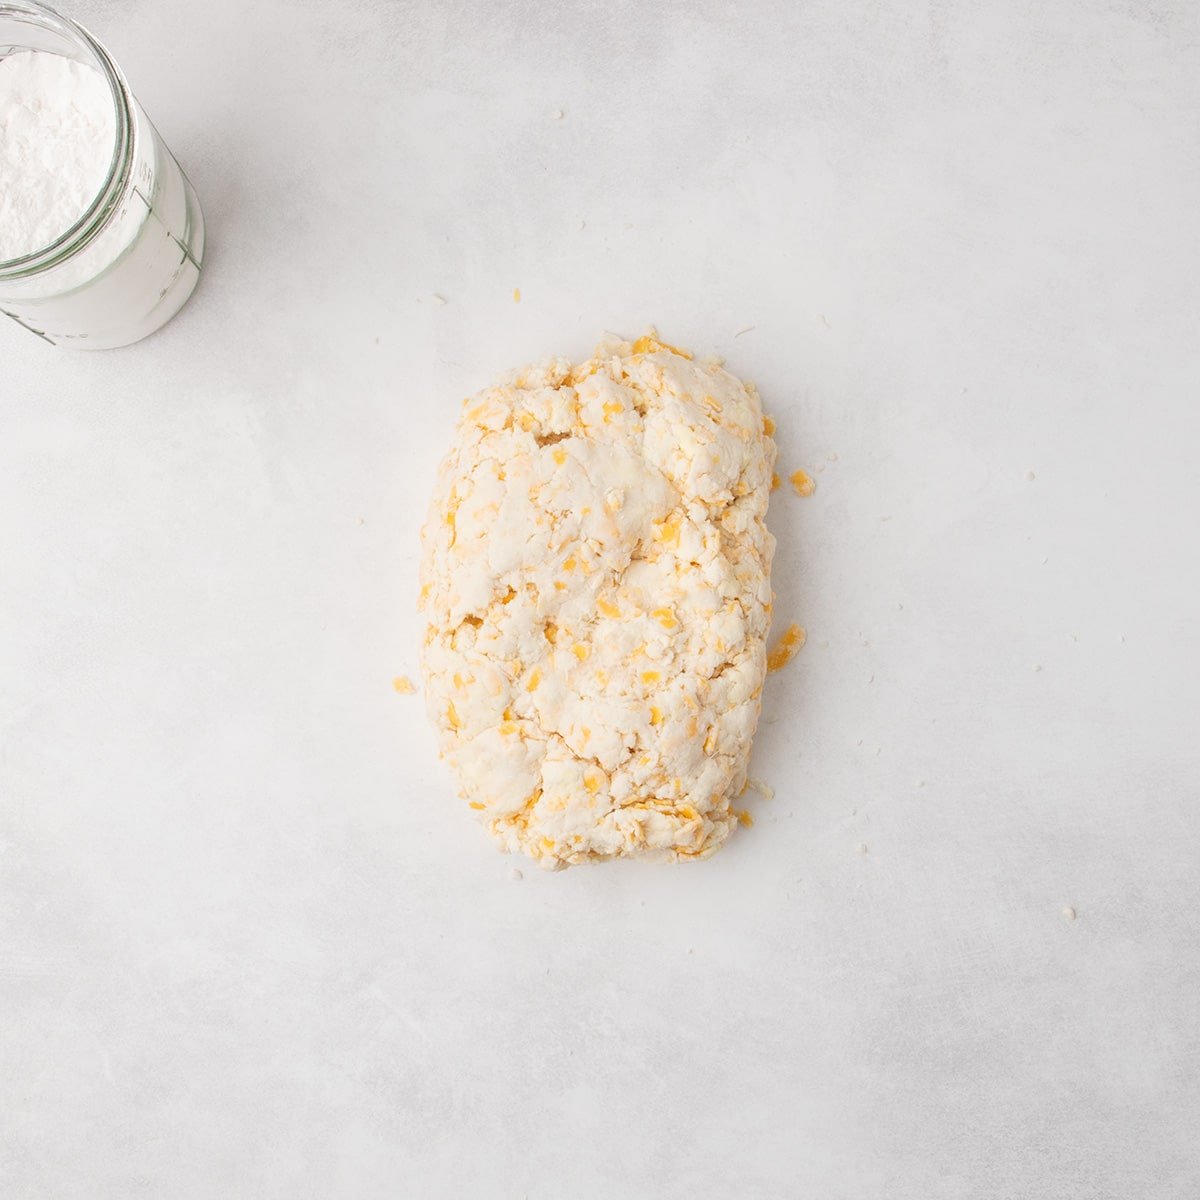
3. The Liquid Binding: Cold buttermilk is gradually incorporated, followed by cold water, to bring the dough together. The careful addition of liquids is essential to achieve a workable dough that is moist but not overly wet, preventing the butter from melting prematurely.
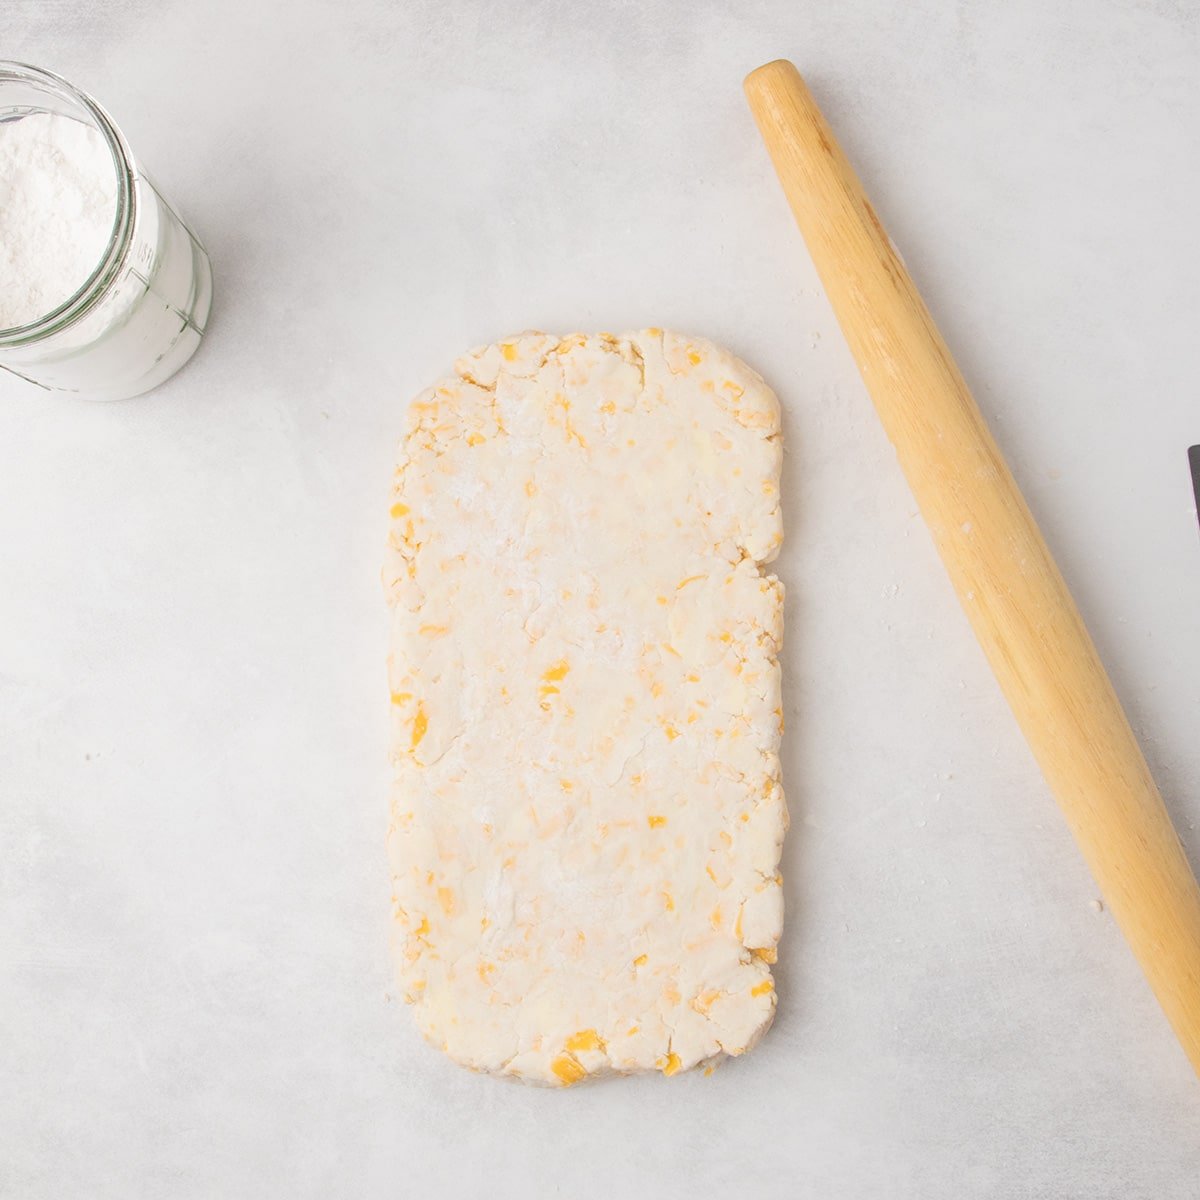
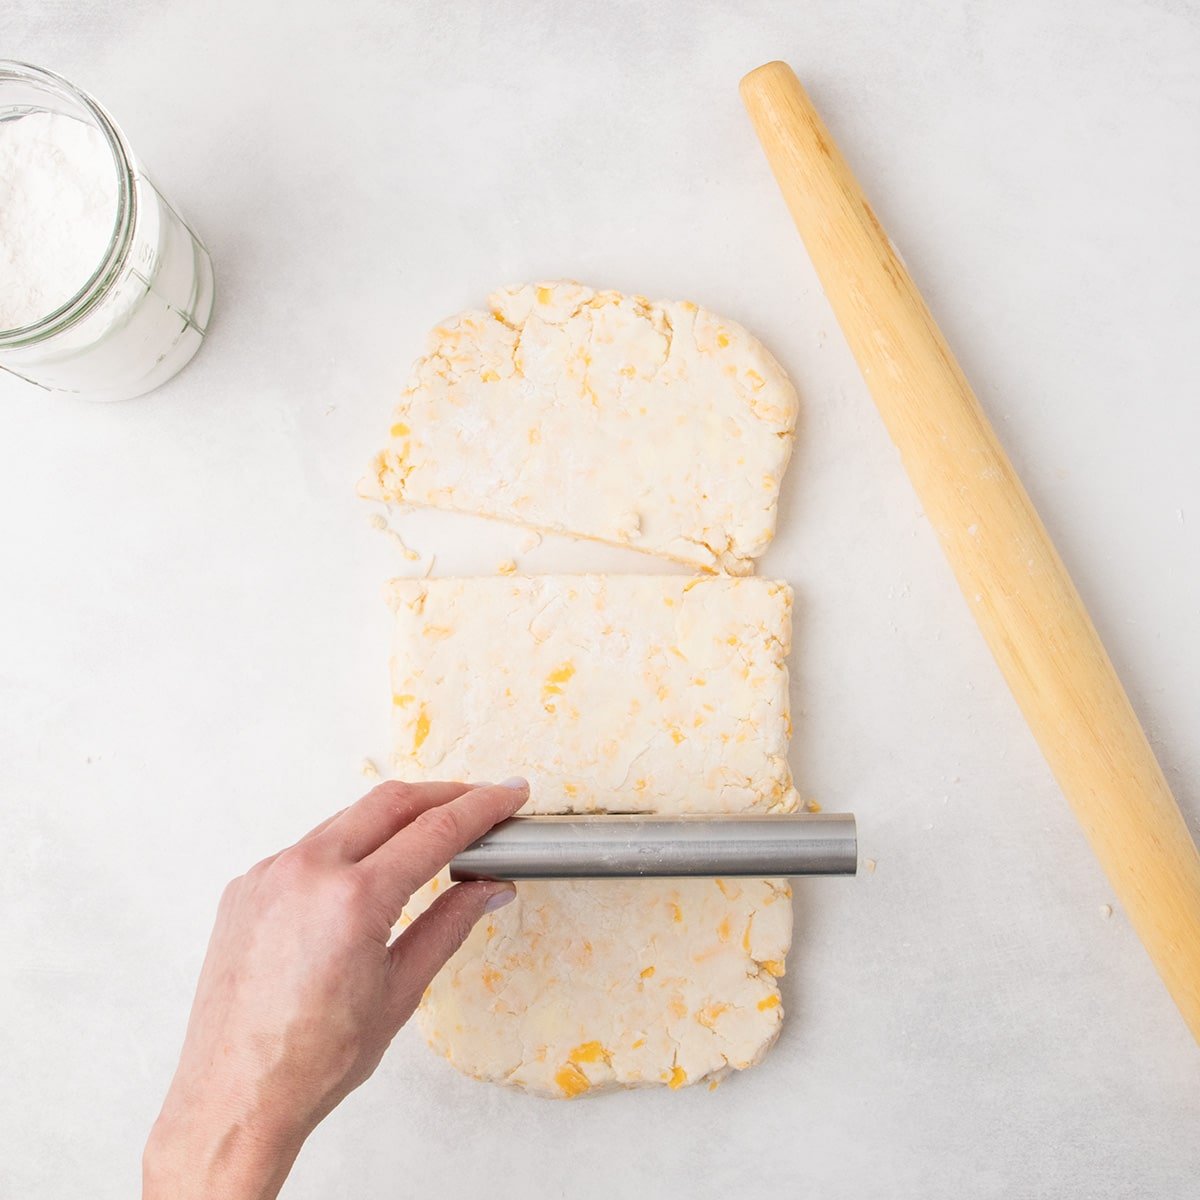
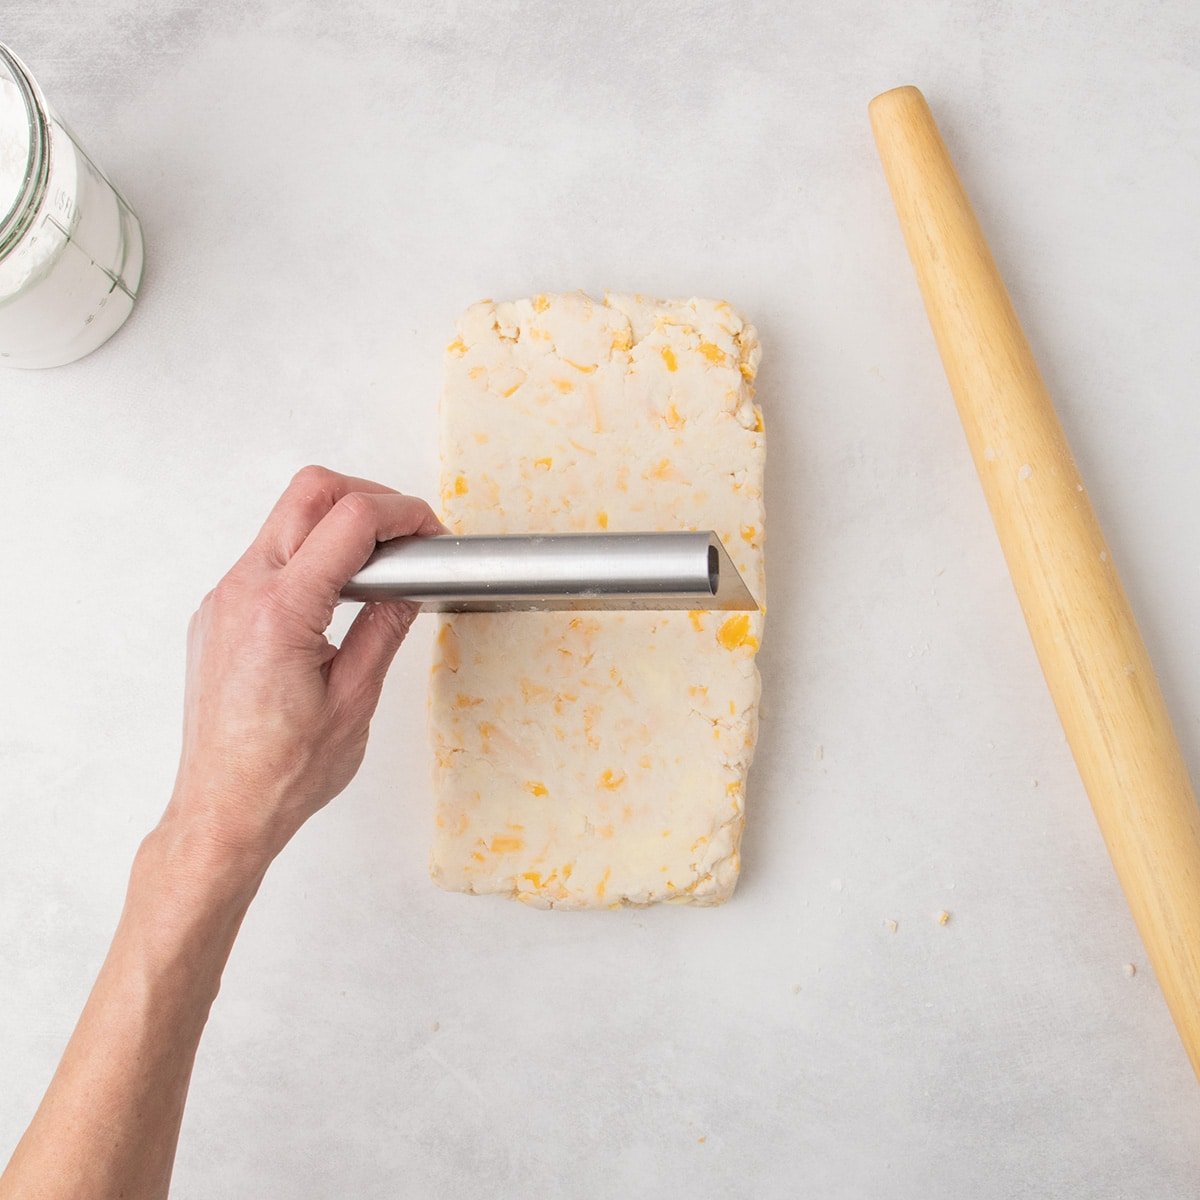
4. Initiating Lamination: The dough is turned out onto a lightly floured surface and pressed into a rough rectangle. It is then rolled into a larger rectangle (approximately 12×6 inches). This step marks the beginning of the lamination process. The dough is cut into three equal smaller rectangles, which are then stacked.
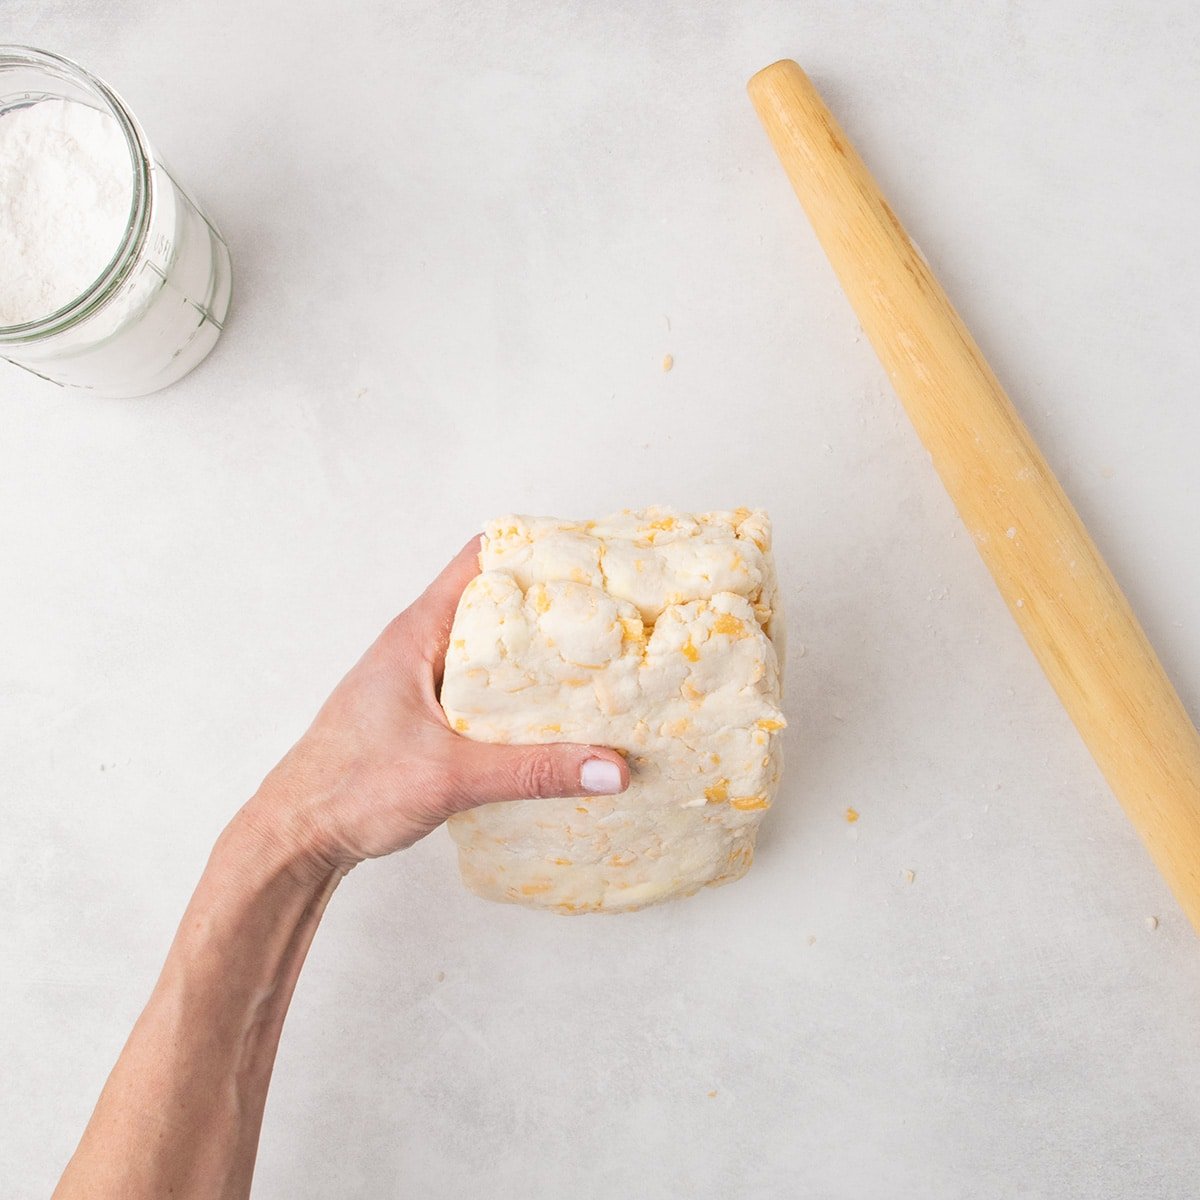
5. Developing Layers: This initial stack of three rectangles is rolled out again to form a larger rectangle. This larger rectangle is then cut in half. The resulting two pieces are stacked, creating a more complex layering of dough and butter. This process is repeated, resulting in a final stack of dough with multiple, distinct layers – the hallmark of a flaky pastry.
6. Shaping the Scones: The stacked dough is gently shaped into a round of about 6 inches in diameter. This is then rolled slightly thinner, to approximately 8 inches in diameter, ensuring the scones will not be excessively thick.
7. Precision Cutting: The round of dough is then meticulously cut into eight triangular wedges. The article emphasizes the importance of using a sharp edge, such as a metal bench scraper or a chef’s knife, and making each cut in a single, swift motion. This technique prevents compressing the dough, which is vital for maximizing oven spring and achieving tall, well-risen scones.
8. The Essential Chill: The cut triangles are placed on a baking sheet and chilled in the refrigerator for 15 to 30 minutes. This crucial step allows any butter that may have softened during handling to re-firm. This ensures the butter is cold enough to create steam and lift the dough layers effectively when baked.
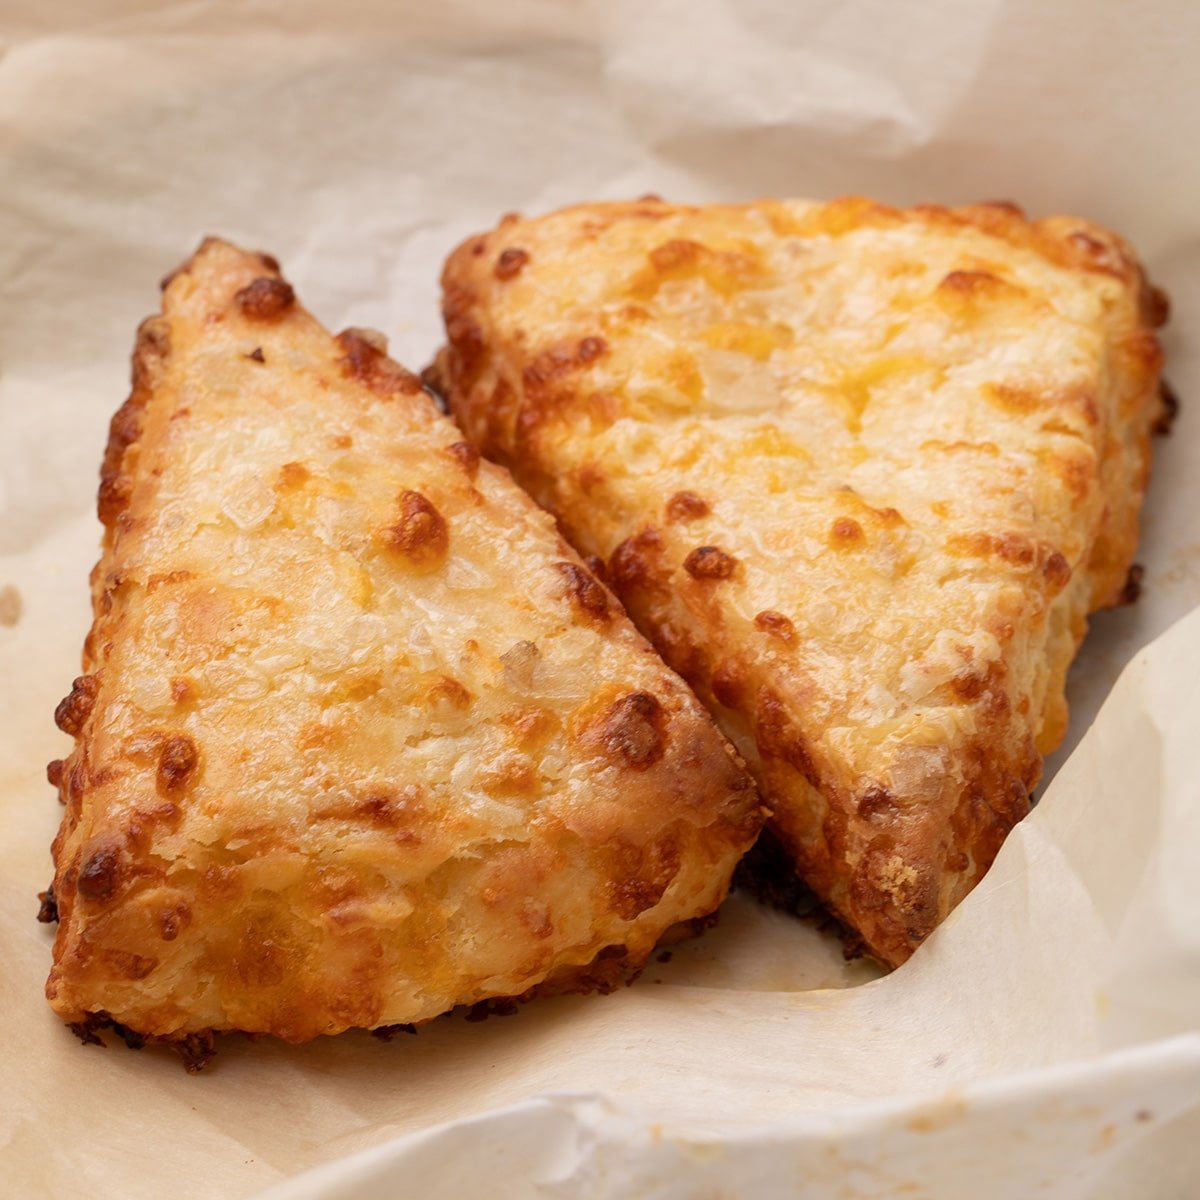
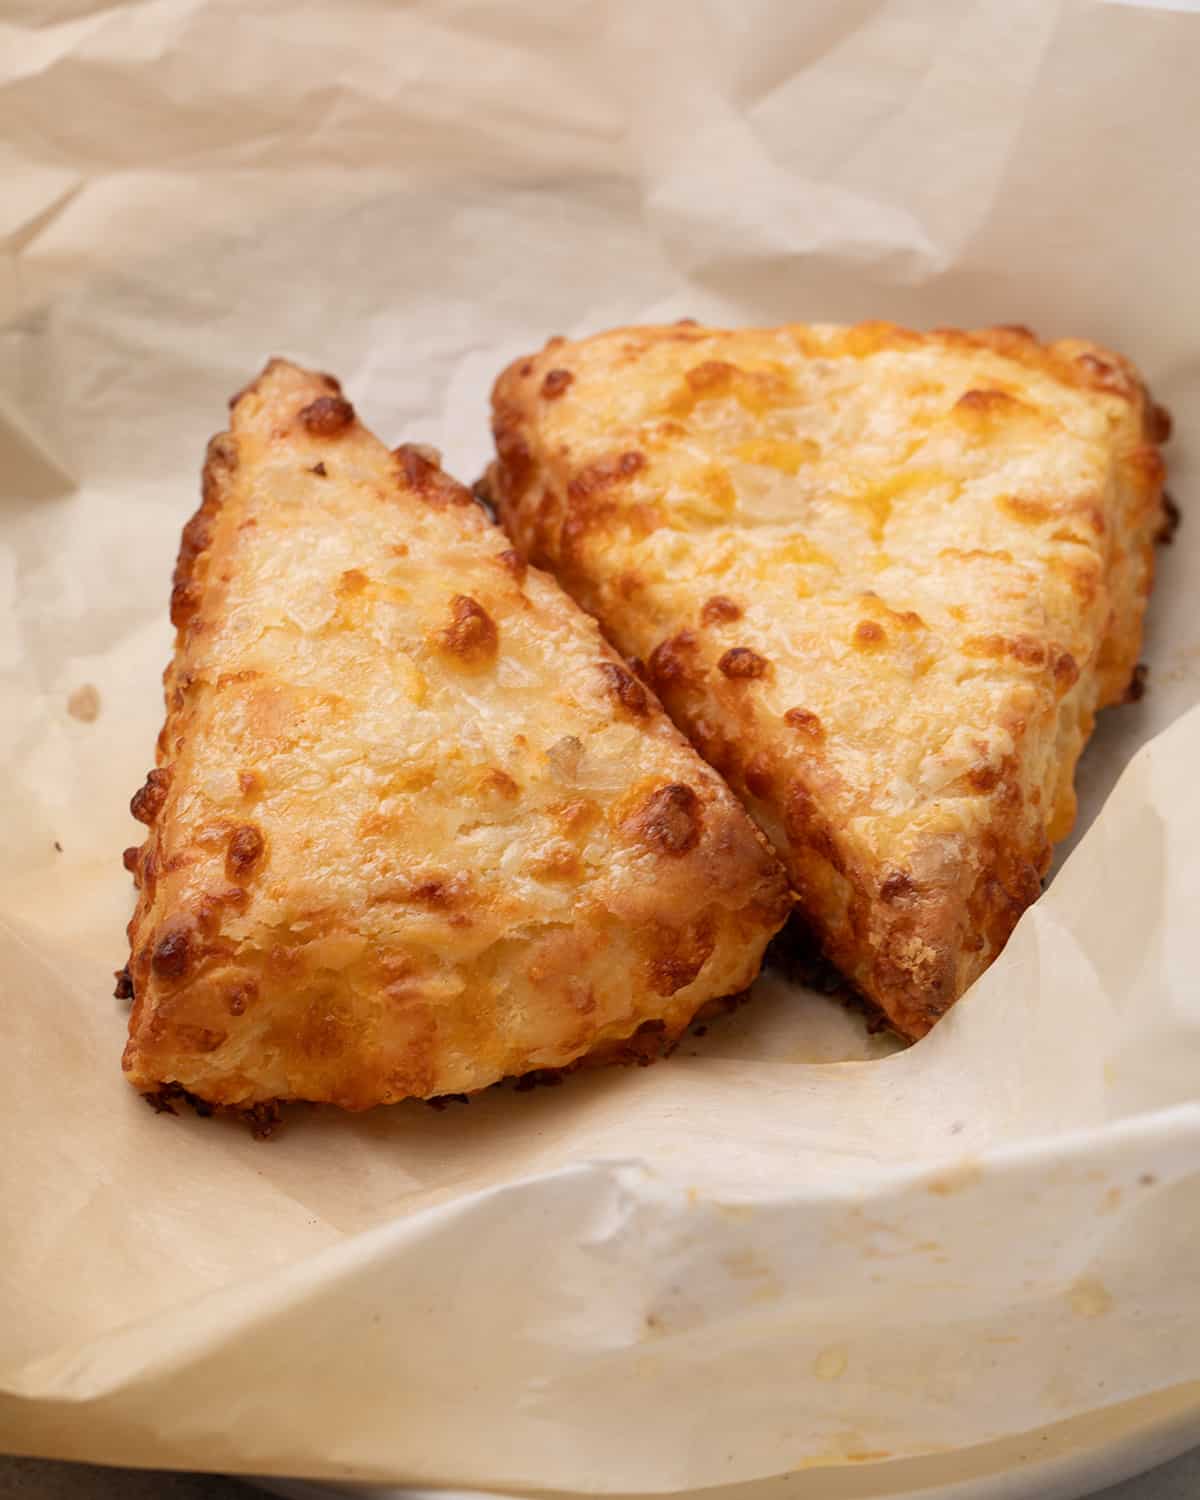
9. Baking to Perfection: The chilled scones are transferred to a parchment-lined baking sheet, spaced about an inch apart to allow for expansion. For added richness and visual appeal, the tops can be brushed with cream and sprinkled with coarse salt. They are then baked at 375°F (190°C) for approximately 20 minutes, or until they are golden brown, firm to the touch, and exhibit the desired lacy edges.
Expert Insights for Superior Scones
The article offers invaluable advice, gleaned from culinary experience, to elevate the success rate of these gluten-free cheese scones.
The Imperative of Cold Butter
The article reiterates the fundamental role of cold butter in achieving a flaky texture. It explains that in the intense heat of the oven, cold butter melts rapidly, creating steam that separates the dough layers. If the butter is too warm, it will simply melt and be absorbed into the dough, resulting in a denser, less flaky pastry. The advice to keep all ingredients, including liquids, cold and to handle the dough minimally with lightly floured hands are practical tips to maintain this critical temperature.
The Significance of Sharp Cuts
The technique for cutting the scones is presented as directly impacting their rise. Using a sharp implement and making clean, decisive cuts ensures that the delicate layers of dough remain intact. Sawing back and forth can compress the dough, hindering its ability to expand vertically in the oven. The emphasis on a single, swift motion with a sharp edge is a key takeaway for achieving optimal height.
The Role of Xanthan Gum and the Egg-Free Advantage
Xanthan gum’s function as a binder in gluten-free baking is thoroughly explained. It mimics gluten’s ability to create a cohesive structure. The article also addresses a common question regarding the use of eggs in gluten-free recipes. It highlights that by carefully adjusting the amount of xanthan gum, it is possible to achieve excellent rise and structure without the need for eggs, making the recipe more accessible to those with egg allergies or preferences. This demonstrates a nuanced understanding of gluten-free baking challenges and solutions.
Adapting the Recipe: Dairy-Free and Ingredient Substitutions
Recognizing the diverse dietary needs of home bakers, the article provides thoughtful guidance on substitutions, particularly for dairy.
Dairy-Free Butter Alternatives
For those seeking a dairy-free version, the recommendation leans towards block-style vegan butter alternatives, such as Melt and Miyoko’s Kitchen brands, or even specific store-brand options like Trader Joe’s. A combination of vegan butter sticks and vegetable shortening is also suggested for an optimal texture.
Crafting a Buttermilk Substitute
If buttermilk is unavailable, or for a dairy-free adaptation, a clever substitute is proposed. A combination of sour cream or Greek-style yogurt (dairy or non-dairy) with milk (dairy or non-dairy) can effectively replicate buttermilk’s acidic properties and creamy texture. The suggestion to use a milk that mimics the consistency of dairy milk, like a carton of coconut milk, further refines the substitution.
Cheese Alternatives
For a dairy-free cheese option, Violife cheddar-style non-dairy cheese is recommended. The author notes that pre-shredded non-dairy cheese may require a slight adjustment in dough hydration, suggesting the cautious addition of more cold water if needed. This practical advice acknowledges the subtle differences in how non-dairy ingredients behave compared to their dairy counterparts.
Storage and Enjoyment
The article concludes with practical advice on storing and refreshing the scones. Best enjoyed fresh, they can be individually wrapped and stored at room temperature for a couple of days. Reheating in a toaster oven with a light sprinkle of water can revive their texture. For longer storage, both raw and baked scones can be frozen, with clear instructions provided for thawing and reheating to maintain their optimal quality.
The detailed exploration of ingredient science, meticulous step-by-step instructions, expert tips, and adaptable substitution options collectively position this guide as a comprehensive resource for mastering gluten-free cheese scones, promising a delightful and flaky culinary experience for all.
