
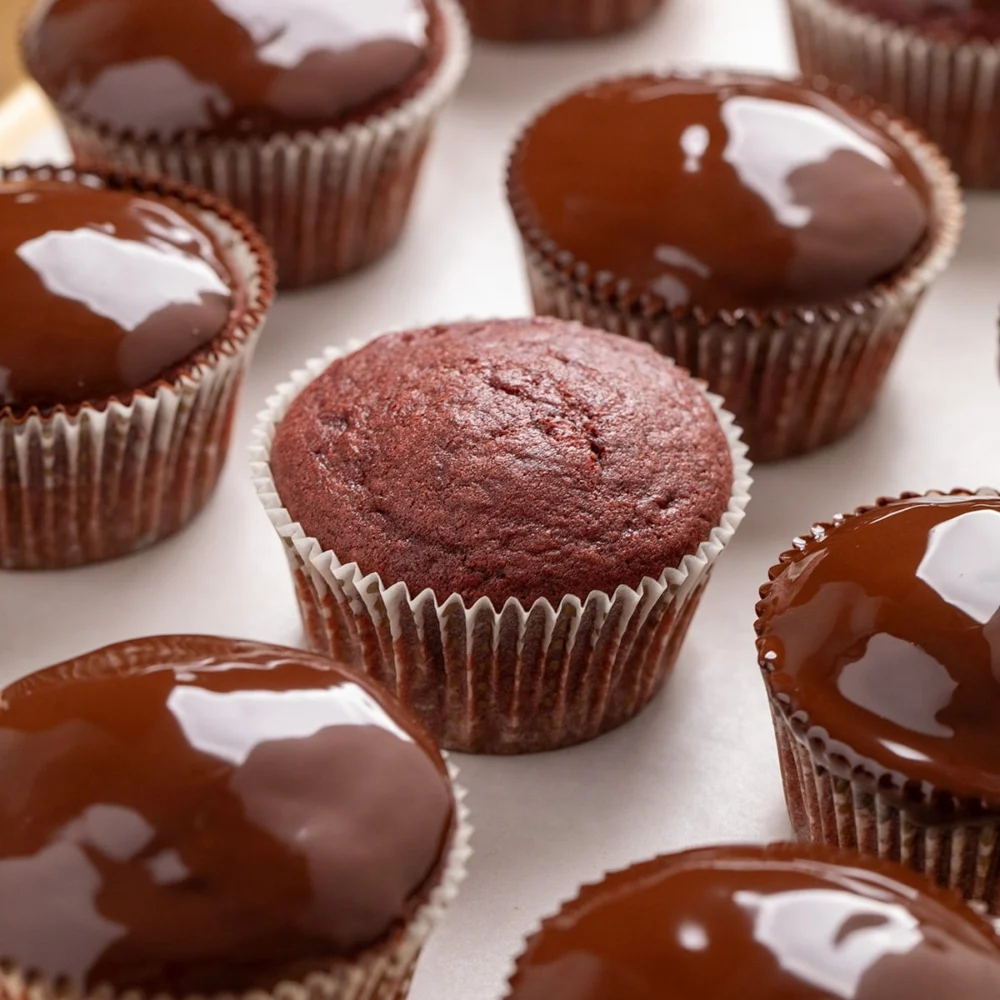
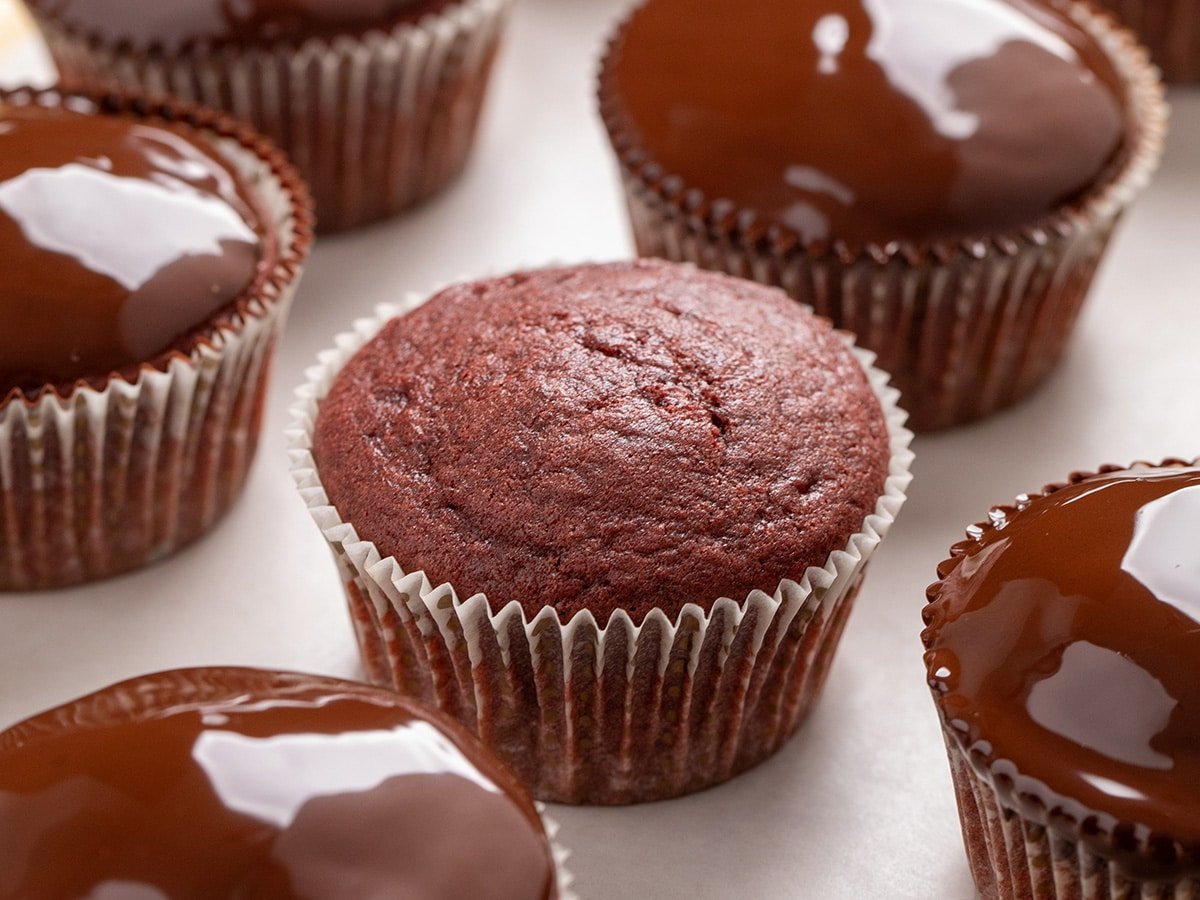
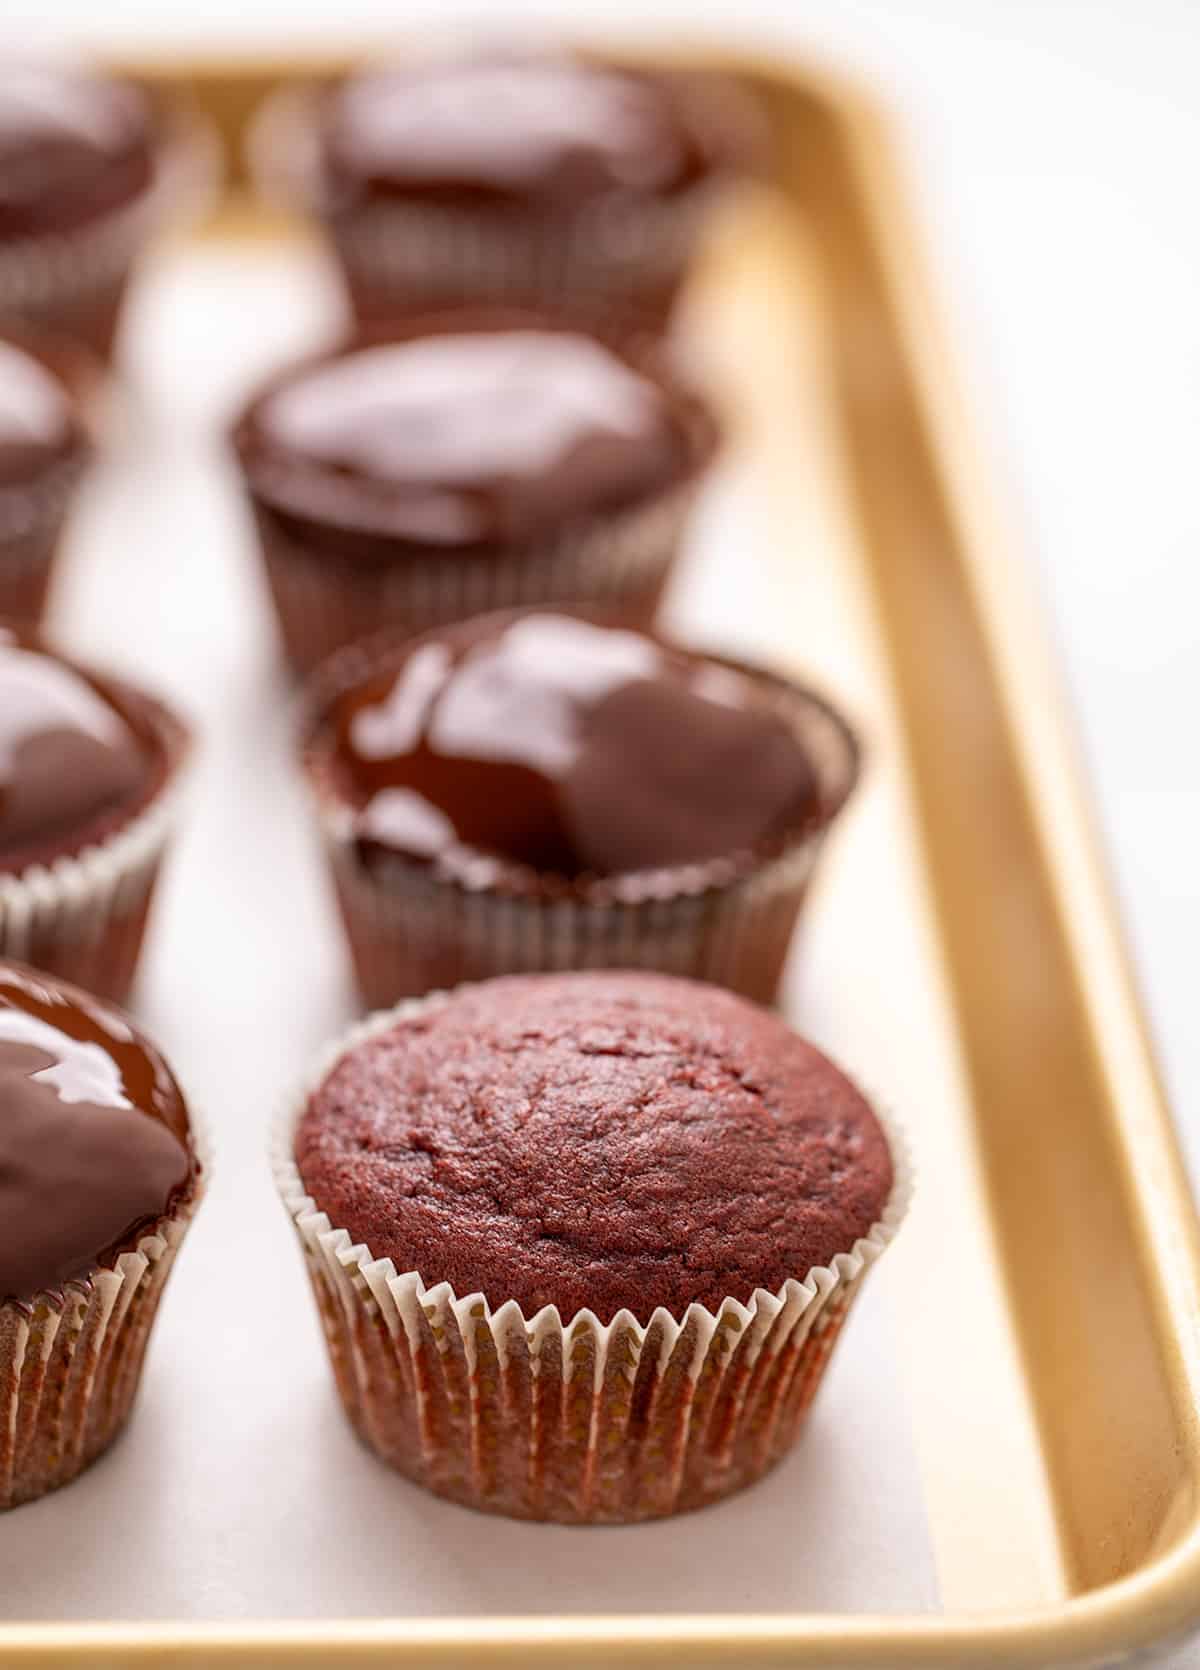
These gluten-free red velvet cupcakes are a culinary triumph, boasting a rich, buttery flavor with a subtle hint of chocolate and an exceptionally tender crumb. The vibrant red hue makes them a perfect centerpiece for any celebration, from birthdays to Valentine’s Day.

A Beloved Classic, Reimagined for Gluten-Free Diets
Red velvet cake has long held a special place in the hearts of many, often chosen for its festive appearance and unique flavor profile that balances the richness of chocolate with a slight tang. For families navigating gluten-free diets, recreating this beloved treat can be a challenge. However, this recipe aims to deliver all the classic elements – the moist texture, the distinctive color, and the delicate chocolate notes – without compromise.
The original article highlights that these cupcakes were a particular favorite for a son with a preference for vanilla, yet who also appreciated the appeal of red velvet for its broader appeal to chocolate lovers. This sentiment underscores the universal charm of red velvet, making it a versatile choice for diverse palates.
The Science Behind the Perfect Gluten-Free Red Velvet
Achieving the characteristic red velvet flavor profile hinges on a precise balance of ingredients. This recipe masterfully employs real buttermilk and apple cider vinegar to impart the subtle tang that defines red velvet. The striking red-brown color is a result of a dual approach: natural cocoa powder provides depth, while highly-pigmented gel food coloring ensures a vibrant hue without the need for excessive amounts.
A key distinction of this recipe, as noted in the original text, is its careful calibration of ingredients specifically for cupcakes. Unlike simply adapting a cake batter, these proportions are optimized to produce cupcakes with a naturally flat top, ideal for glazing or frosting, and to guarantee a moist texture that endures.
The accompanying chocolate glaze, a simple two-ingredient creation, offers an elegant finish. For those seeking more elaborate decoration, the recipe also suggests a variety of gluten-free frosting options.
A Detailed Look at the Ingredients
The success of these gluten-free red velvet cupcakes relies on the thoughtful selection of each component. Understanding the role of each ingredient is crucial for achieving the desired texture and flavor:

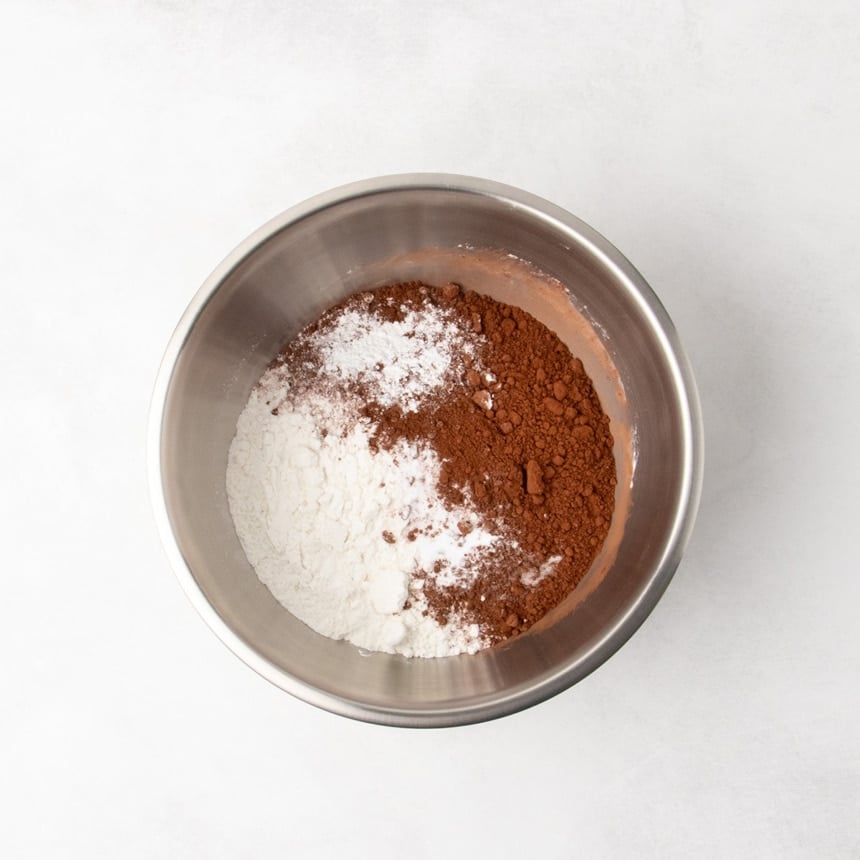
- Gluten-Free Flour Blend: A high-quality all-purpose gluten-free flour blend that includes xanthan gum is essential. The original article specifically recommends Better Batter original blend, Nicole’s Best multipurpose blend, or Bob’s Red Mill 1-to-1 flour with an added half teaspoon of xanthan gum. This blend provides the structure that wheat flour typically offers, while xanthan gum acts as a binder, crucial for preventing a crumbly texture in gluten-free baking.
- Cocoa Powder: Natural cocoa powder, as opposed to Dutch-processed, contributes to the characteristic red hue and a more subtle chocolate flavor that allows the other red velvet notes to shine.
- Leavening Agents: Baking powder and baking soda work in tandem to provide lift and create a tender crumb. The baking soda reacts with the acidic components (buttermilk and vinegar) to produce carbon dioxide gas, which causes the batter to rise.
- Salt: Salt enhances all the other flavors in the recipe, balancing sweetness and deepening the overall taste profile.
- Butter: Unsalted butter, at room temperature, is crucial for creating a light and tender crumb. The creaming process incorporates air into the batter, contributing to the cupcake’s delicate texture.
- Granulated Sugar: Sugar not only sweetens the cupcakes but also contributes to their tenderness and moisture retention.
- Eggs: Eggs provide structure, richness, and act as a binder. They also contribute to the overall moisture and color of the cupcakes.
- Buttermilk: Buttermilk is a cornerstone of red velvet. Its acidity reacts with baking soda, tenderizing the crumb and contributing to the cake’s signature tang.
- Apple Cider Vinegar: This, along with buttermilk, provides the necessary acidity for the leavening reaction and adds to the characteristic red velvet flavor.
- Vanilla Extract: Vanilla extract enhances the overall flavor profile and adds a warm, aromatic note.
- Gel Food Coloring: Highly concentrated gel food coloring, particularly "super red" varieties, is recommended for achieving a vibrant red color without altering the batter’s consistency or flavor.
Step-by-Step Guide to Crafting Perfect Cupcakes
The process of creating these gluten-free red velvet cupcakes is designed for clarity and success, with visual aids provided to guide bakers through each stage.
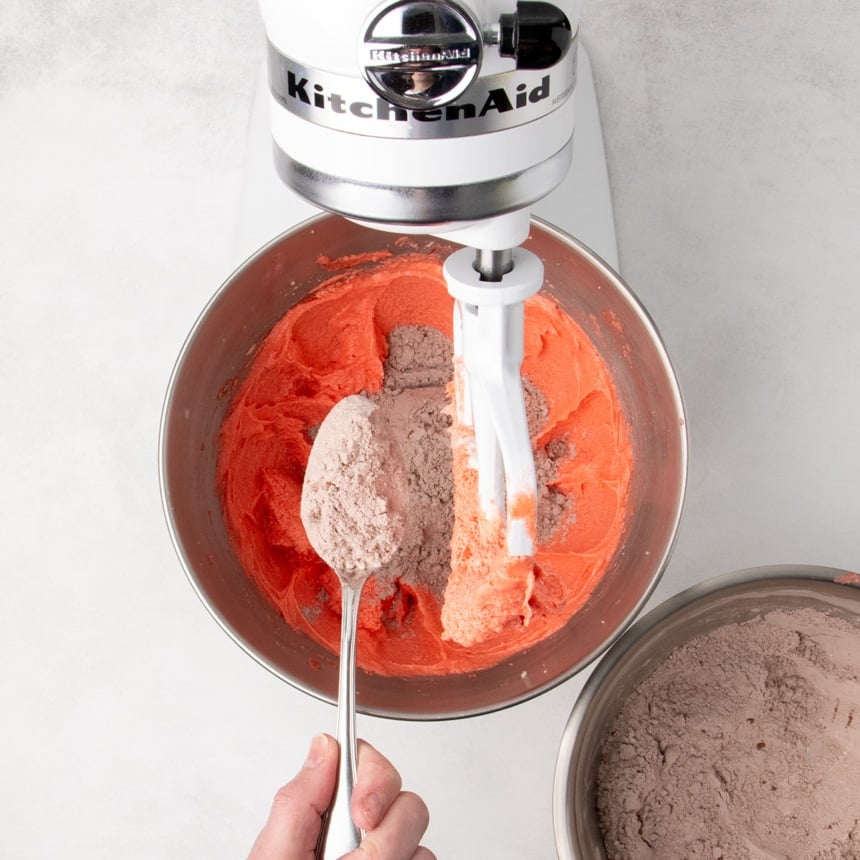
Preparing the Dry Ingredients
The initial step involves whisking together all dry ingredients: the gluten-free flour blend, baking powder, baking soda, salt, and cocoa powder. This ensures an even distribution of leavening agents and prevents any pockets of concentrated ingredients, leading to a uniform rise and texture.
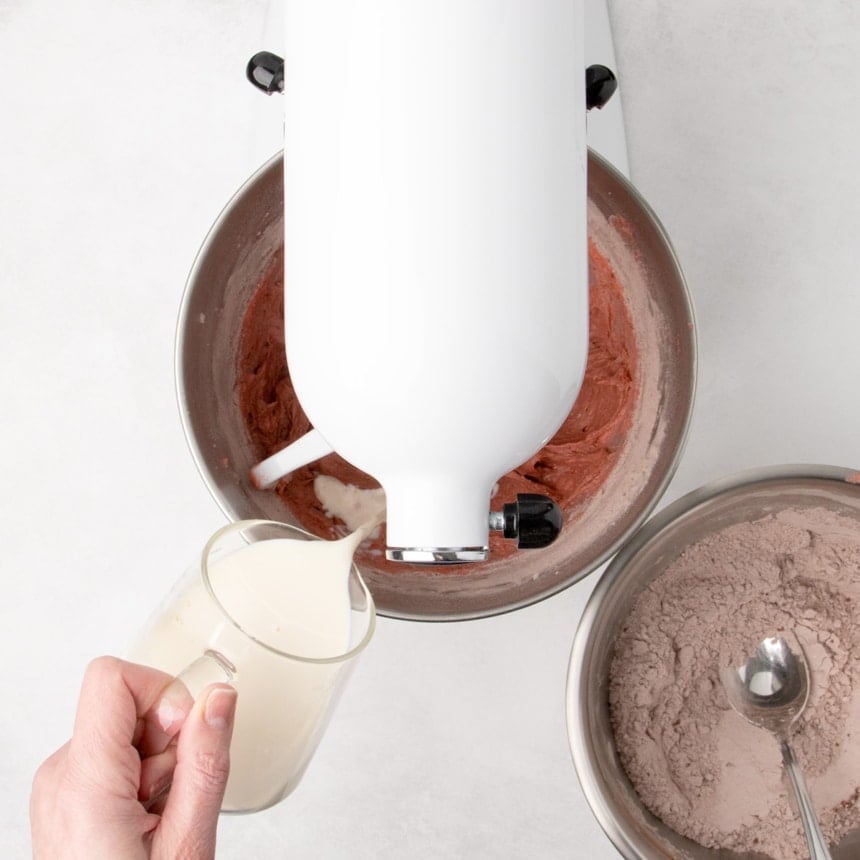
Creating the Buttermilk Mixture
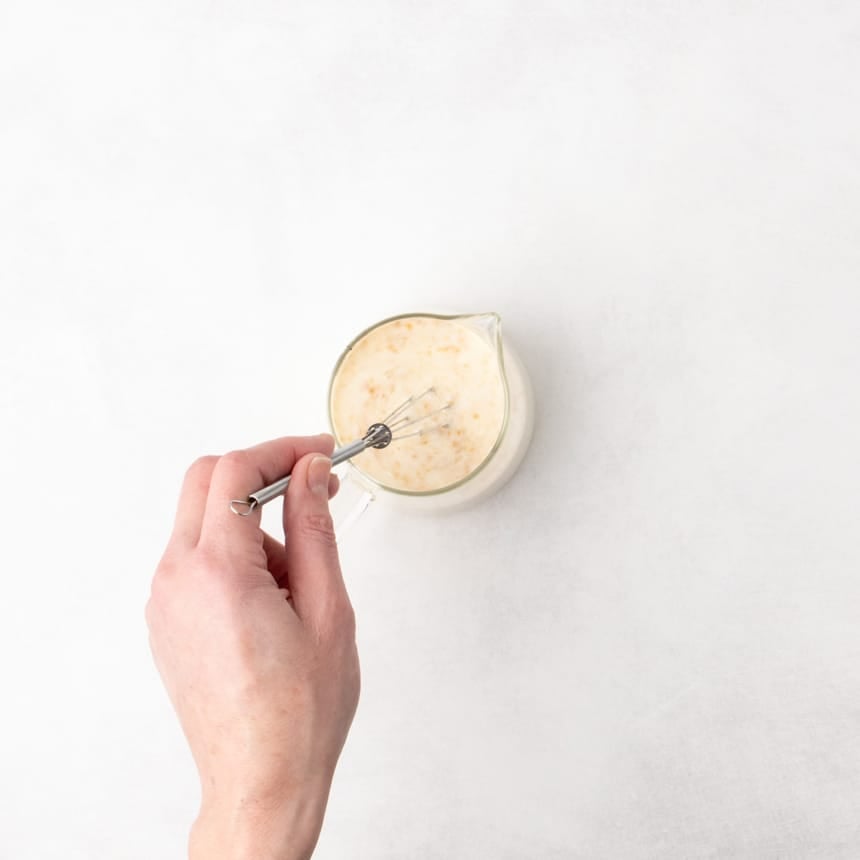
In a separate container, combine the buttermilk, vanilla extract, and apple cider vinegar. Whisking these together ensures a smooth, homogenous liquid mixture, preventing any potential clumping when added to the batter.
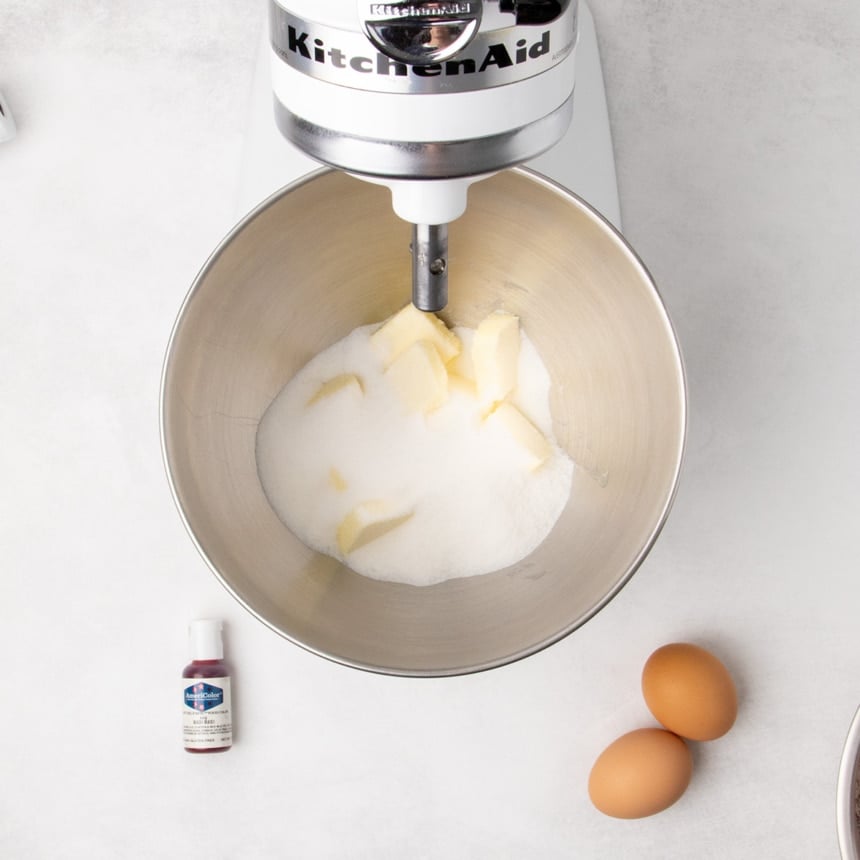
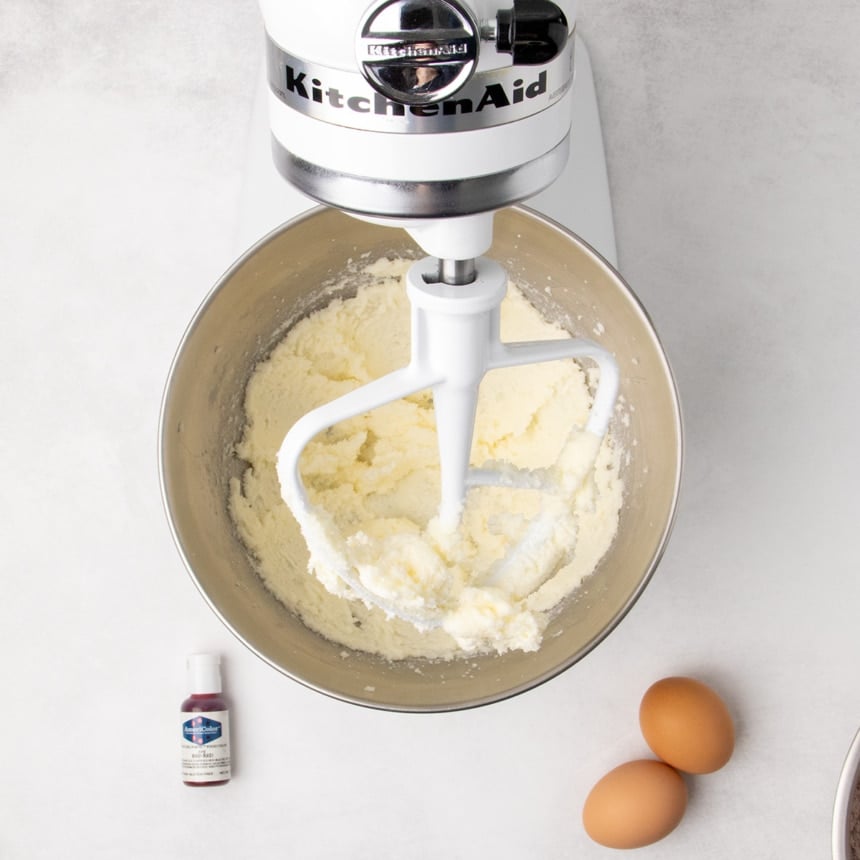
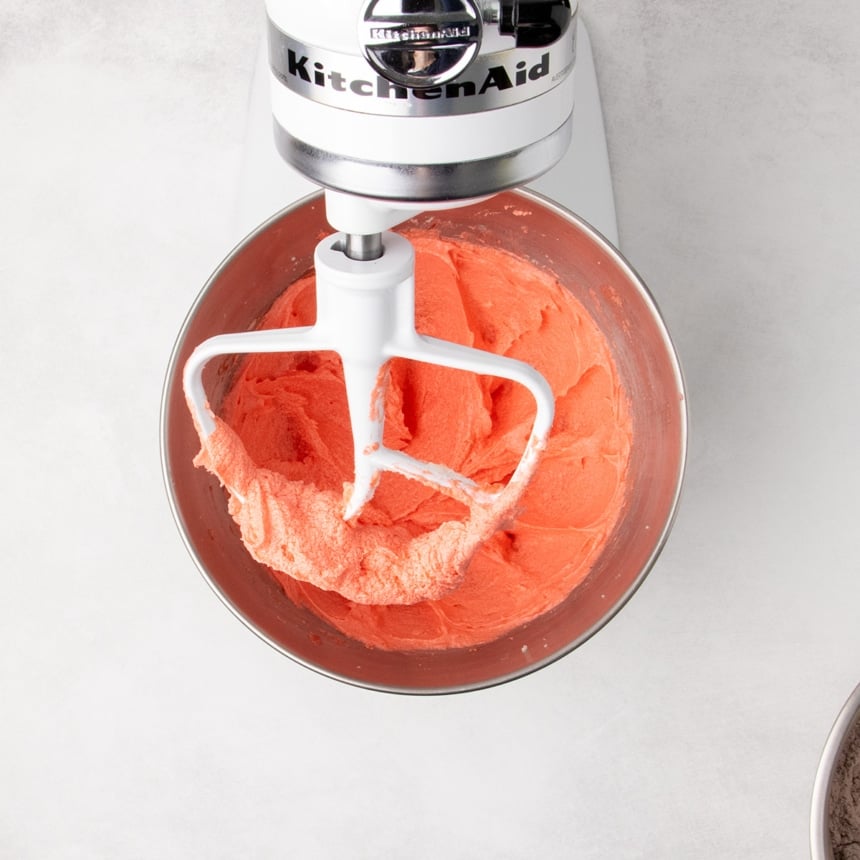
The Art of Creaming Butter and Sugar
The creaming of room-temperature butter and sugar is a critical step. Using a stand mixer with a paddle attachment or a handheld mixer, cream these ingredients for no more than two minutes. This process is designed to slightly break down the sugar crystals and incorporate a minimal amount of air, which contributes to a light and tender crumb without causing the cupcakes to dome excessively. It’s important that the butter is at the ideal temperature (68-70°F or 20-21°C) to achieve a smooth, non-pebbly mixture.
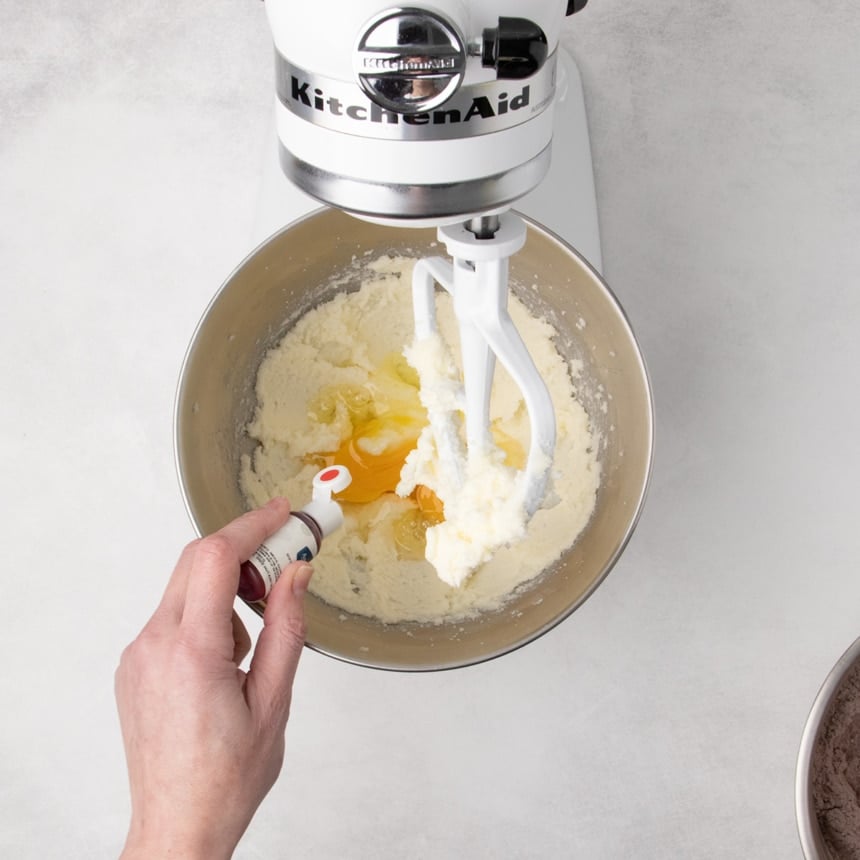
Incorporating Eggs and Color
Following the creaming stage, beat in the eggs one at a time until fully incorporated. Then, add approximately ¼ teaspoon of super red gel food coloring. The batter should achieve a bright red hue, as the color tends to fade slightly during baking.
Assembling the Batter
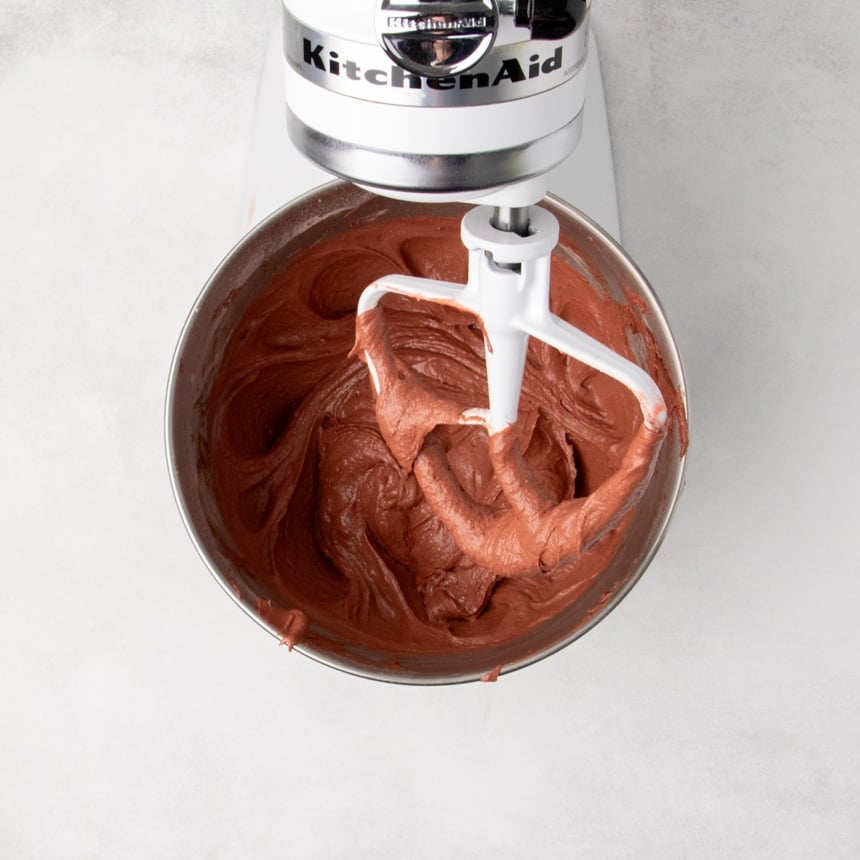
The batter is completed by alternating the addition of the dry ingredients and the buttermilk mixture. Begin and end with the dry ingredients, adding them in three batches and the liquid mixture in two. This gradual incorporation method ensures that all ingredients are evenly combined without overmixing, which can lead to a tough texture.
Filling and Baking
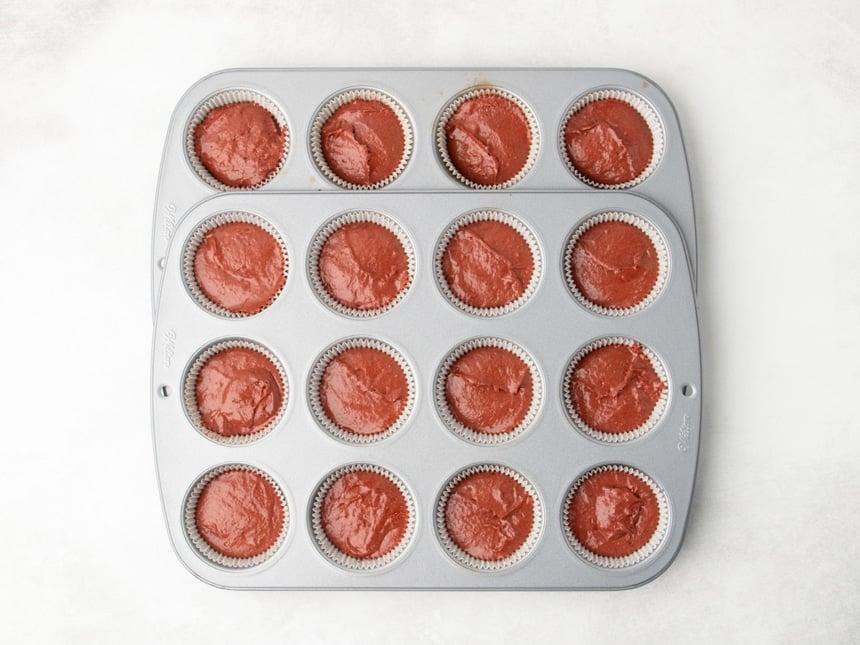
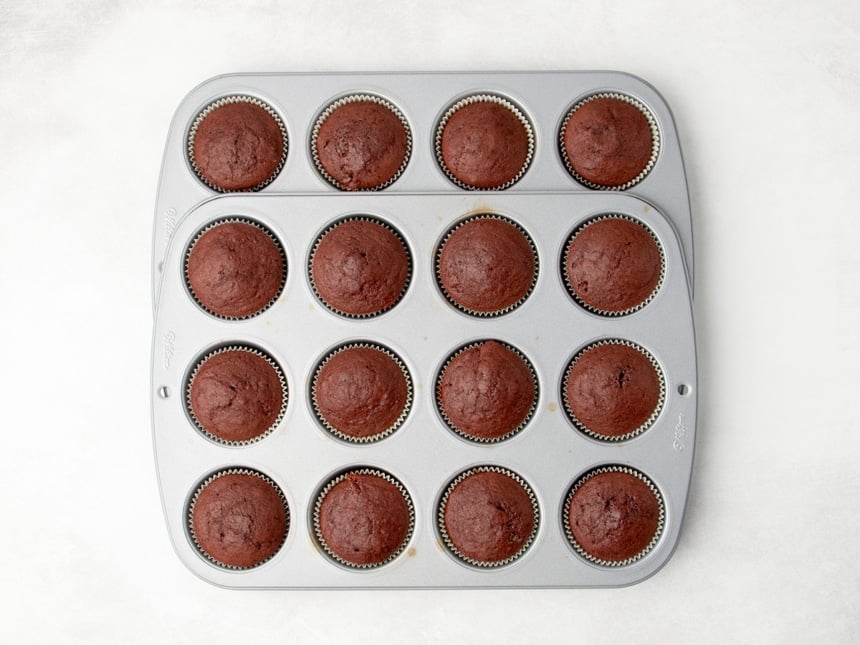
The smooth, soft, reddish-brown batter is then divided into lined cupcake wells, filling each approximately two-thirds full. Overfilling can lead to domed tops, which are undesirable for a classic cupcake presentation.
The cupcakes are baked at a relatively low temperature of 325°F (163°C). This lower baking temperature is a deliberate choice to encourage a slow, even bake, preventing doming and ensuring the bottoms don’t burn. A brief cooling period in the tin before transferring to a wire rack is recommended to prevent steaming and maintain the cupcakes’ delicate texture.
The Finishing Touch: Chocolate Glaze
For an optional but highly recommended flourish, a simple two-ingredient chocolate glaze can be prepared by melting chopped chocolate with a small amount of shortening. This creates a glossy, rich coating that sets without becoming overly hard. Once the cupcakes have cooled completely, the tops are dipped into the glaze, and then allowed to set.
Expert Insights for Baking Perfection
Several key techniques and considerations can elevate the success of these gluten-free red velvet cupcakes:
Avoiding Over-Creaming
The primary goal of creaming butter and sugar is to dissolve the sugar and introduce a small amount of air. Over-beating can incorporate too much air, leading to a muffin-like dome rather than the desired flat top for cupcakes. Adhering to the recommended two-minute creaming time is crucial.
The Power of Gel Food Coloring
When it comes to achieving that iconic red velvet color, gel food coloring is paramount. Liquid food coloring is less concentrated and would require a larger volume, potentially impacting the batter’s texture and flavor. High-quality gel colors, like those from Americolor, offer intense pigmentation, meaning a little goes a long way. It’s important to remember that the baking process can mute the color, so the batter should appear more intensely colored than the desired final product.
The "Nesting" Technique for Efficient Baking
For bakers working with limited oven space, a clever method for baking multiple batches of cupcakes is the "nesting" technique. This involves placing a full tin of cupcakes on one oven rack and nesting a second tin, with empty wells, within the first. This allows for efficient use of oven space. While the second batch might rise slightly higher, the results are generally acceptable. Alternatively, the batter for the second tin can rest while the first batch bakes.
Adapting the Recipe for Dietary Needs
This recipe is thoughtfully designed to accommodate various dietary restrictions and preferences:
Dairy-Free Adaptations
For a dairy-free version, buttermilk can be substituted by combining 6 tablespoons of non-dairy milk with ½ cup of non-dairy sour cream or plain Greek-style yogurt. Block-style vegan butter, such as Melt or Miyoko’s, is recommended over tub margarines, which often contain a higher oil content. Ensure that any chocolate used for the glaze is also dairy-free.
Egg-Free Alternatives
Individuals requiring an egg-free recipe can successfully substitute the eggs with chia eggs, Bob’s Red Mill Egg Replacer, or JustEgg liquid egg replacer. These alternatives effectively mimic the binding and structural properties of eggs in baking.
Food Dye-Free Option
For those who wish to avoid food coloring altogether, the gel food coloring can simply be omitted. This will not impact the flavor or texture of the cupcakes, though the vibrant red hue will be absent, resulting in a more natural brown color.
Shortening Substitutions
Spectrum or Crisco brand shortenings are recommended for the chocolate glaze. Virgin coconut oil, which is solid at cool room temperature, can serve as an effective substitute, offering a similar consistency when melted.
Storage and Shelf Life
Proper storage is key to maintaining the freshness of these gluten-free red velvet cupcakes. Once cooled, they can be stored in an airtight container at room temperature for approximately two days. The chocolate glaze, by sealing in moisture, can extend this freshness to closer to three days.
For longer-term storage, freezing is a viable option. While the chocolate glaze may develop a white bloom in the freezer, this is purely cosmetic and does not affect the taste. Thaw the cupcakes at room temperature. Unglazed cupcakes can also be defrosted in the microwave for about 20 seconds.
Frequently Asked Questions
Can these cupcakes be transformed into a cake?
While the flavor profile is similar, the ingredient proportions for a cake differ. For a gluten-free red velvet cake, it is recommended to follow a dedicated cake recipe.
Can milk and lemon juice substitute for buttermilk?
No, this substitution does not replicate the moisture content or viscosity of commercial buttermilk. For a suitable alternative, plain kefir or a mixture of half sour cream and half milk by volume can be used.
Is apple cider vinegar replaceable?
Yes, an equal amount of white vinegar or fresh lemon juice can be used as a substitute for apple cider vinegar in this recipe.
The creation of these gluten-free red velvet cupcakes represents a significant advancement in gluten-free baking, offering a delicious and visually appealing treat that rivals its traditional counterpart. By adhering to the precise instructions and expert tips, bakers of all levels can achieve a delightful result, perfect for any occasion.